Some iPhone users encounter difficulties when attempting to share their location via iMessage, receiving a notification stating, "No Active Device Used For Your Location. You can check your settings in Find My." Despite troubleshooting network settings and performing a network reset, the issue persists. If you're facing a similar problem, follow these steps to resolve it:
1. Enable Location Services and Precise Location:
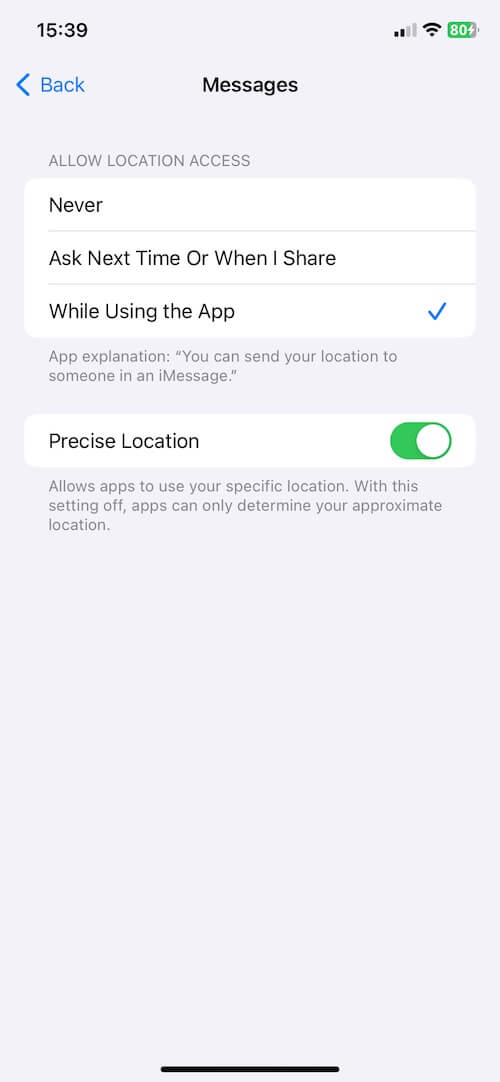
Ensure that your iPhone permits the use of Location Services and Precise Location for iMessages and other applications. Navigate to iPhone Settings -> Privacy & Security -> Location Services. Confirm that Location Services is enabled. Scroll down to locate the Messages app, tap on it, and select the "While Using the App" option to allow to send your location in an iMessages. Additionally, activate Precise Location to allow sharing of specific locations.
2. Location in Find My iPhone
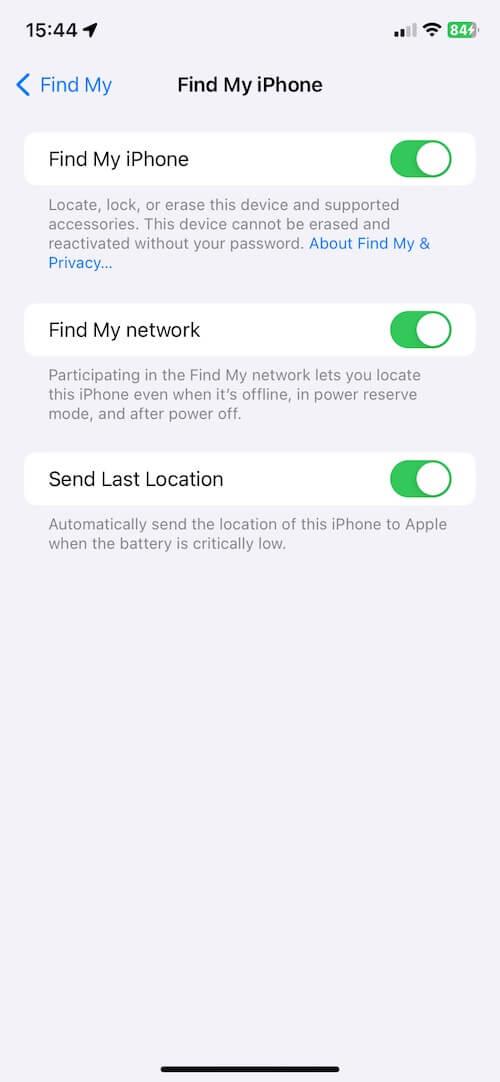
The warning message above advises enabling location services in Find My iPhone. Navigate to iPhone Settings -> Apple ID -> Find My. Then, activate "Share My Location". Next, access Find My iPhone and switch on "Find My iPhone", "Find My network", and "Send Last Location".
3. Restart Your iPhone:
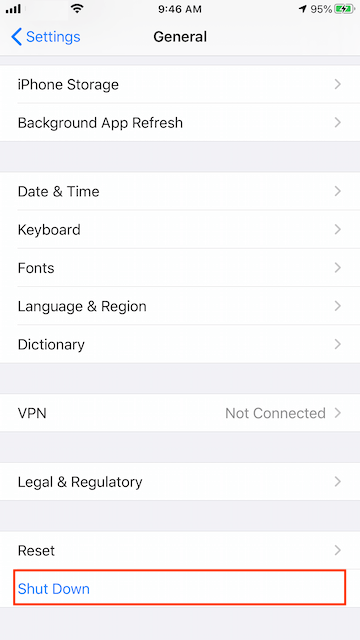
After completing the aforementioned steps, restart your iPhone. Access iPhone Settings -> General -> Shut Down, and slide to power off. Turn on your iPhone again by pressing and holding the side button or Sleep/Wake button until the Apple logo appears.
4. Reset iPhone Location & Privacy Settings:
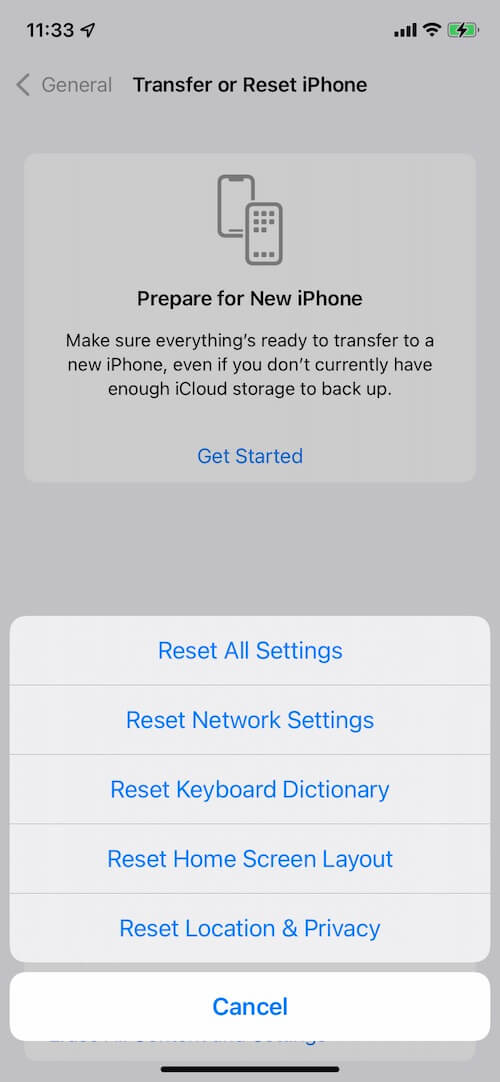
Navigate to iPhone Settings -> General -> Transfer or Reset [device] -> Reset -> Reset Location & Privacy. This action restores all location settings to their factory defaults, temporarily halting location services for all applications until permission is granted again.
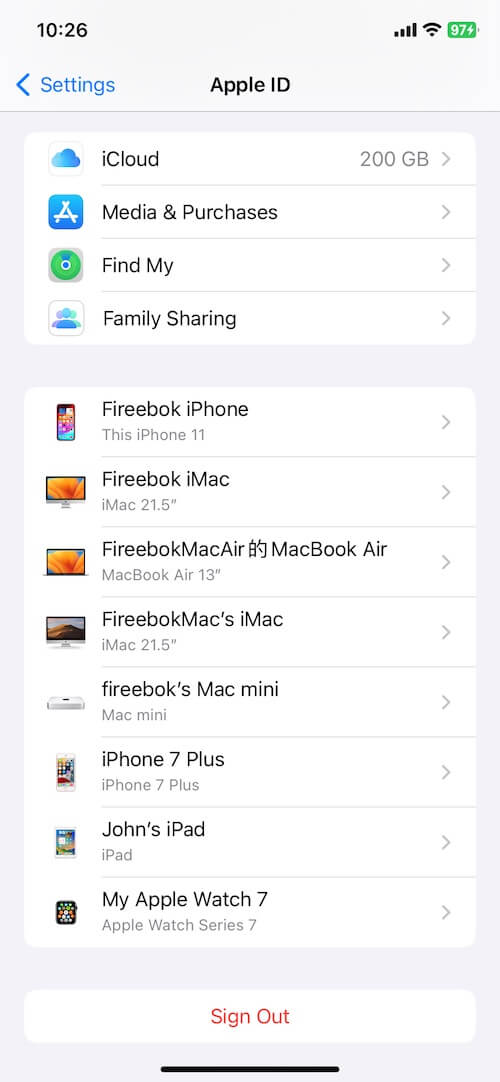
5. Sign Out of iCloud:
Some users have reported a correlation between this issue and iCloud. Attempt signing out and then signing back into your Apple ID to resolve it. Access iPhone Settings -> Apple ID -> iCloud -> Sign Out. Enter your Apple ID password and tap "Turn Off." Choose the data you wish to retain on your device, then tap "Sign Out." Subsequently, sign back into your Apple ID. Upon signing in, your iCloud data will be re-downloaded and added to your iPhone.

About Fireebok Studio
Our article content is to provide solutions to solve the technical issue when we are using iPhone, macOS, WhatsApp and more. If you are interested in the content, you can subscribe to us. And We also develop some high quality applications to provide fully integrated solutions to handle more complex problems. They are free trials and you can access download center to download them at any time.
| Popular Articles & Tips You May Like | ||||
 |
 |
 |
||
| How to Recover Deleted Text Messages from Your iPhone | Top 6 reasons WhatsApp can’t backup | How to Clean up Your iOS and Boost Your Device's Performance | ||