Many iPhone users also use a Windows PC instead of a Mac. While Apple provides several ways to transfer and sync data, moving photos and videos from an iPhone to a Windows PC can sometimes be more complicated than expected.
The most common task for iPhone and PC users is transferring photos and videos from an iPhone to a PC. This is especially important when your iPhone is running out of storage space and you want to move photos and videos to your computer or an external storage device.
Some users don't use iCloud Photos and keep their photos and videos stored locally on their iPhone. In this case, transferring photos to a PC can help free up valuable iPhone storage space.
Other users have iCloud Photos enabled and use Optimize iPhone Storage. In this situation, the original, full-resolution photos and videos may be stored in iCloud rather than directly on the iPhone. When you connect the iPhone to a Windows PC and copy files through File Explorer, some photos may not be available as full-resolution originals until they are downloaded to the iPhone.
There can also be other issues when transferring photos from an iPhone to a PC, such as:
• Photos and videos not being transferred completely
• Full-resolution originals not being available
• Photo metadata not being preserved correctly
• Incorrect photo dates after transfer
• Photo albums and folder organization not being preserved
• An unstable USB connection interrupting the transfer
• Manually selecting thousands of photos taking too much time
In this guide, we'll show you how to transfer all photos from an iPhone to a Windows PC, including several methods for transferring photos to a PC or external storage while preserving the original files and, where supported, photo metadata and album organization.
1. Transfer Photos from iPhone to External Storage with PhotosDrive
PhotosDrive provides a convenient way to export photos and videos from an iPhone or iPad to an external storage device. Using an external SSD, hard drive, or USB flash drive can be especially useful if you have a large photo library and don't want to transfer everything through a Windows PC first.
Instead of manually selecting photos one by one, PhotosDrive can help you export an entire photo album or multiple photos and videos. Depending on the export options you use, you can preserve the original photo files and metadata, maintain album organization, and even rename photos during the export process.
PhotosDrive can also be used for regular photo backups, making it useful if you want to periodically back up photos and videos from your iPhone to external storage.
a. Connect an external drive to your iPhone
First, connect your external storage device to your iPhone or iPad. Depending on your iPhone model and connector, you may need a compatible USB-C connection, a powered USB hub, or an Apple Lightning to USB 3 Camera Adapter.
For large photo and video libraries, exFAT is generally a practical choice because it supports large files. Other file systems supported by iPhone and iPad can include FAT32, APFS, and HFS+. NTFS support may be limited, so check the compatibility of your particular iPhone and drive before starting the transfer.
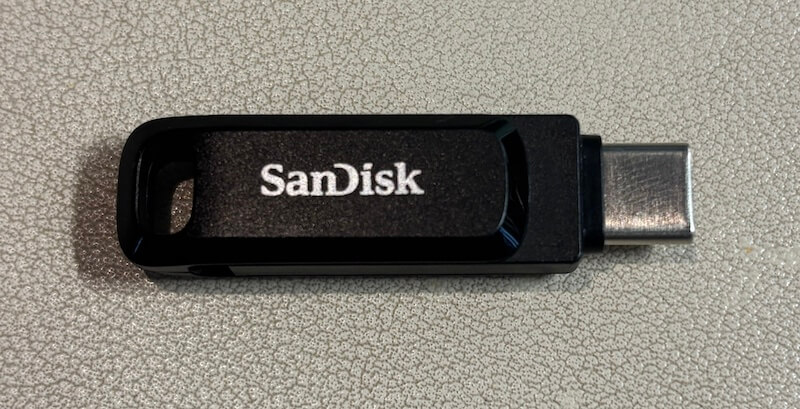
b. Check the external drive in the Files app
After connecting the external drive:
1. Open the Files app on your iPhone or iPad.
2. Tap Browse.
3. Look under Locations
4. Tap the name of your external drive.
5. Make sure you can access the drive normally
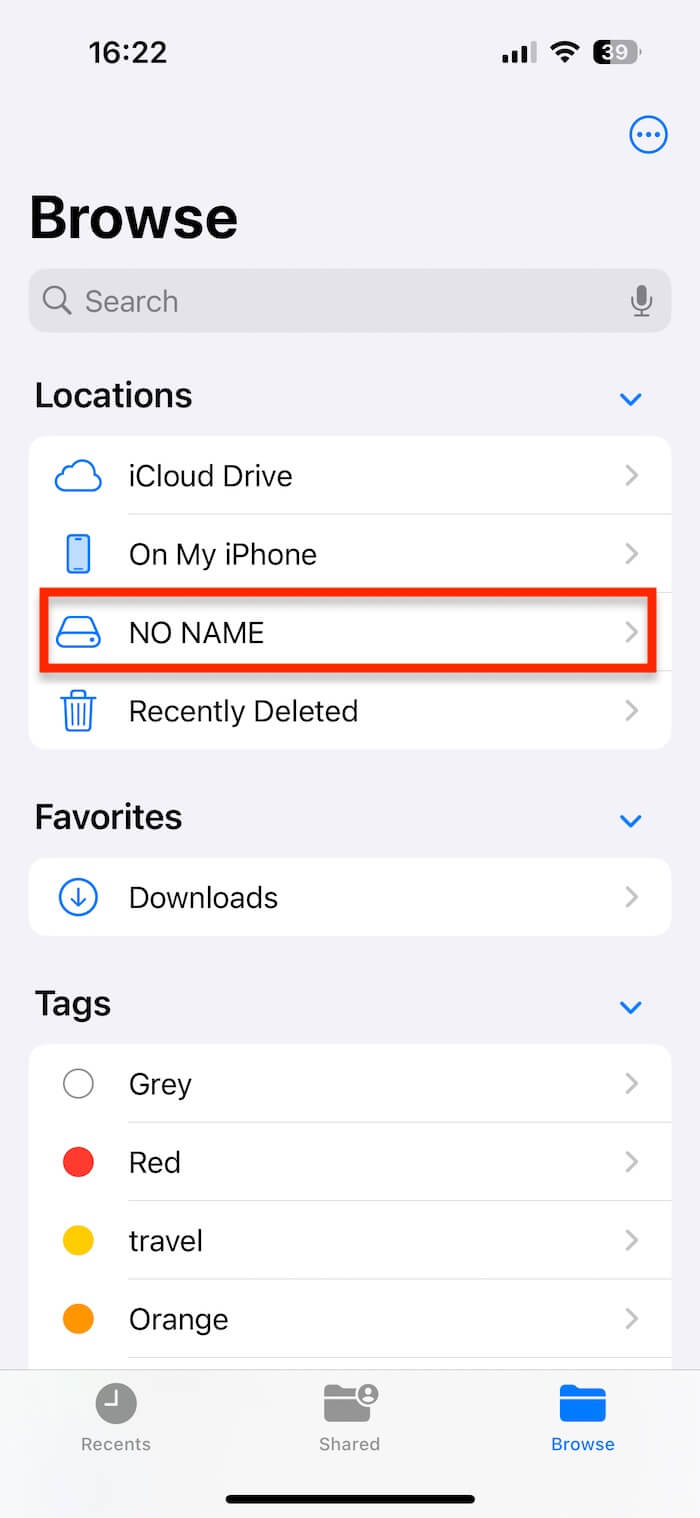
c. Export photos with PhotosDrive
After confirming that the external drive is working:
1. Download and install PhotosDrive on your iPhone or iPad.
2. Open PhotosDrive.
3. Tap Select and choose the photos or photo album you want to export.
4. Tap Export Selected Photo Album.
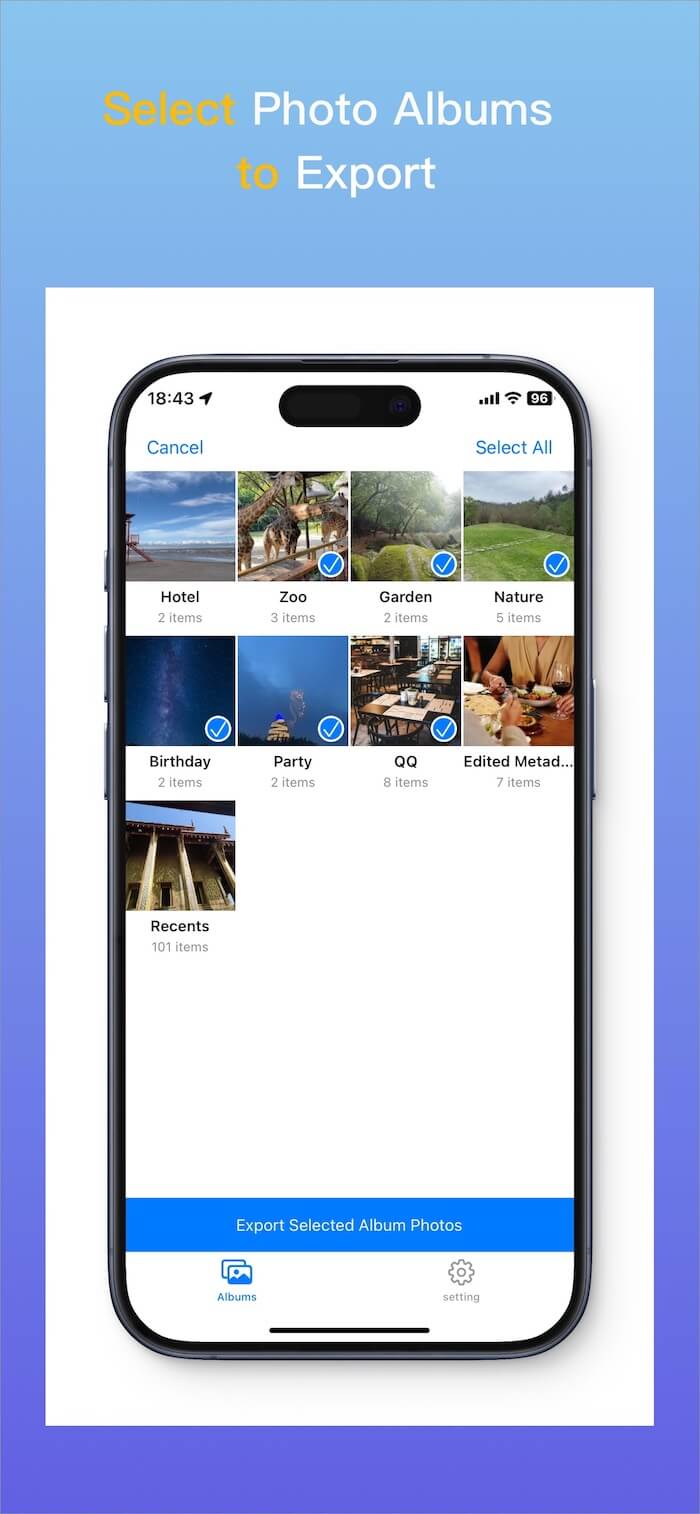
5. Select your external drive under Browse → Locations.
6. Tap Open. Wait for the export process to finish.
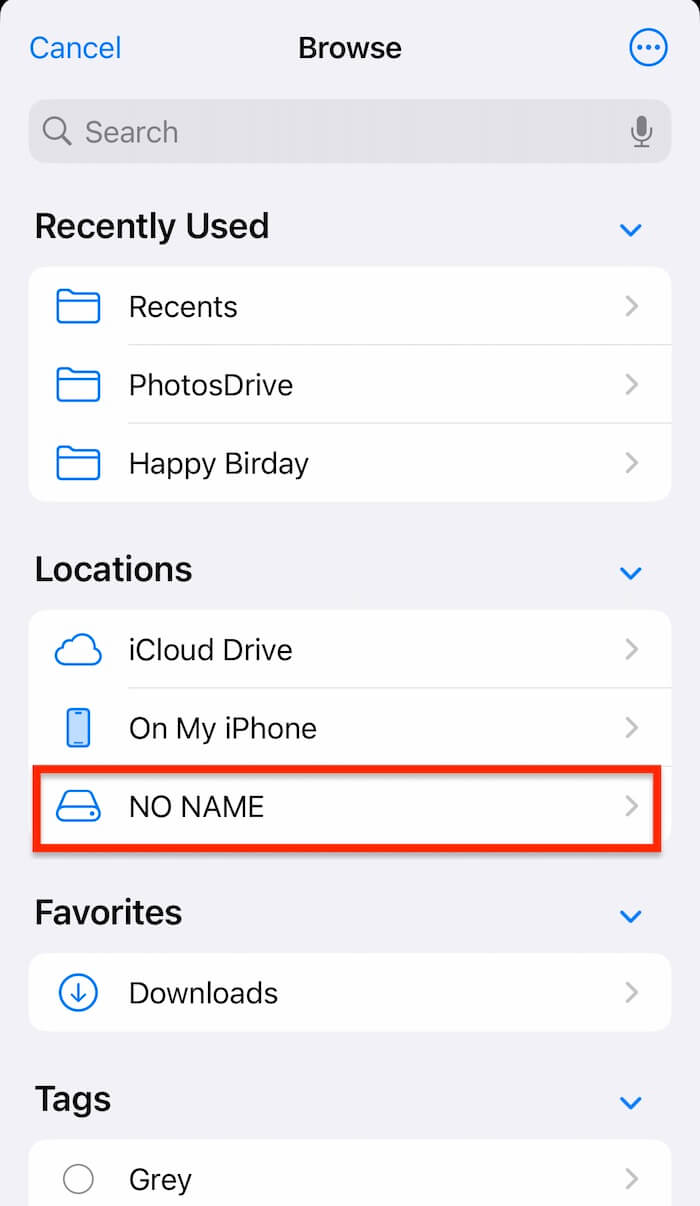
Once the export is complete, you can connect the external drive to your Windows PC and access the transferred photos and videos.
This method can be particularly useful when you need to transfer a large number of iPhone photos without relying on a direct iPhone-to-PC connection.
2. Transfer iPhone Photos to PC with iCloud for Windows
If you use iCloud Photos on your iPhone, iCloud for Windows is another convenient way to access your iCloud photo library from a Windows PC.
First, download and install iCloud for Windows from the Microsoft Store. Sign in with the same Apple Account that you use on your iPhone.
After installing iCloud for Windows:
1. Open iCloud for Windows.
2. Select Photos.
3. Turn on iCloud Photos.
4. Click Done.
5. Open File Explorer on your Windows PC.
6. Select iCloud Photos.
7. Find the photos and videos you want to download. Download the original files to your PC.
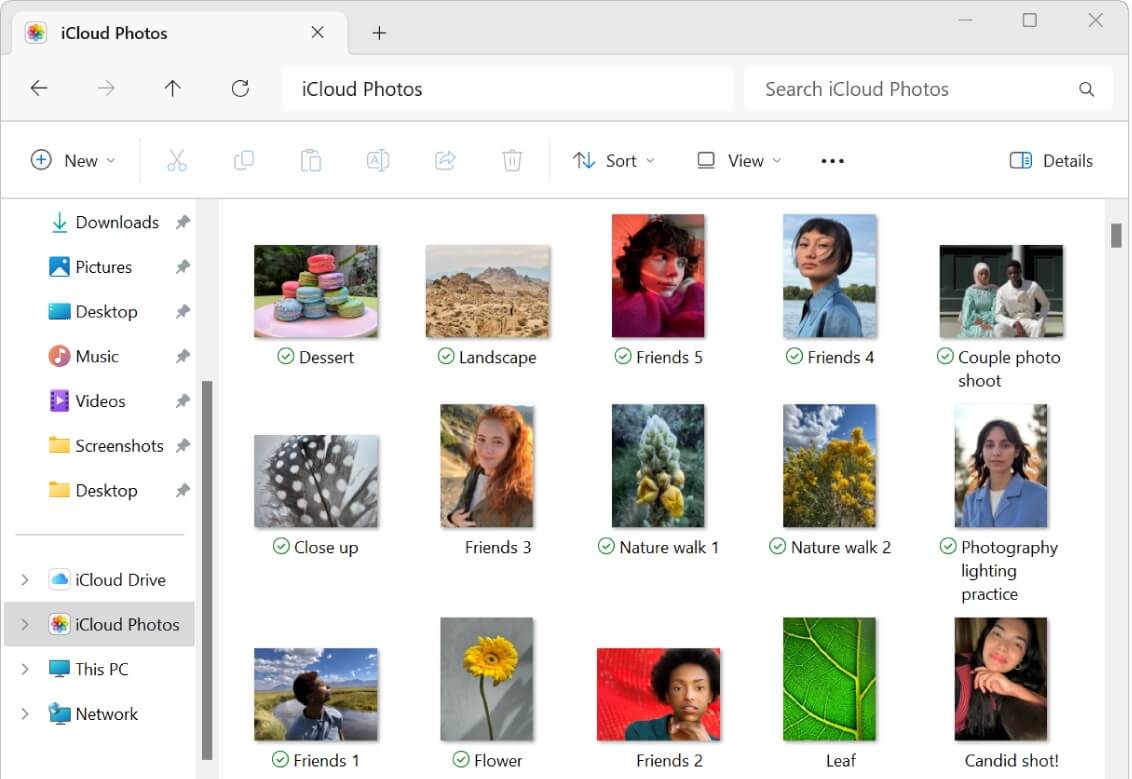
One important advantage of this method is that your photos can be downloaded directly from iCloud rather than relying entirely on the copies currently stored on your iPhone.
However, if you have a very large iCloud Photos library, downloading everything can take considerable time and requires enough free storage space on your PC.
3. Transfer iPhone Photos to PC Using Windows File Explorer
The simplest method is to connect your iPhone directly to your Windows PC with a USB cable and copy the photos using File Explorer. Connect your iPhone to your PC with a USB cable. Unlock your iPhone and tap Trust if Windows asks you to trust the computer.
Then:
1. Open File Explorer on Windows.
2. Select your iPhone under This PC.
3. Open Internal Storage. Open the DCIM folder.
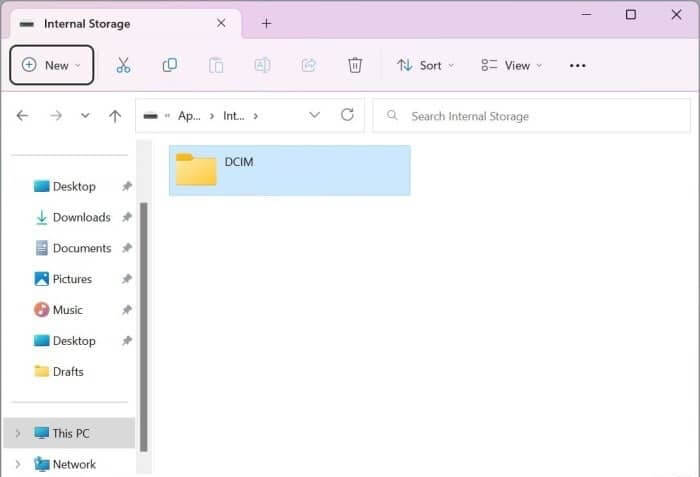
4. Open the available photo folders. Select the photos and videos you want to transfer.
5. Copy and paste them to a folder on your PC.
This method doesn't require additional software, so it can be a good choice when you only need to transfer a relatively small number of locally stored photos.
Why Windows File Explorer may not transfer all original photos
There is an important limitation to consider if you use iCloud Photos with Optimize iPhone Storage.
When Optimize iPhone Storage is enabled, your iPhone may keep smaller, space-saving versions of some photos and videos on the device while the full-resolution originals remain in iCloud.
As a result, when you connect the iPhone to Windows and browse the DCIM folders, the files available for copying may not always represent the complete set of full-resolution originals stored in iCloud.
For this reason, Windows File Explorer is not always the best option for transferring an entire iCloud Photos library.
Use PhotosDrive if you want to:
• Transfer a large number of photos and videos
• Export entire photo albums
• Keep original photo files
• Preserve photo metadata
• Transfer photos directly to external storage
• Rename photos during export
• Create regular iPhone photo backups
Use iCloud for Windows if you:
• Already use iCloud Photos
• Want to download photos from iCloud to your PC
• Have enough iCloud and PC storage
• Don't need to transfer directly to an external drive
Use Windows File Explorer if you:
• Want a simple, built-in Windows method
• Have photos stored locally on your iPhone
• Only need to transfer a smaller number of photos
• Don't need to preserve the iPhone's album structure
Conclusion
There are several ways to transfer photos from an iPhone to a Windows PC, but the best method depends on whether your original photos are stored locally on your iPhone or in iCloud.
Windows File Explorer is convenient for locally stored photos, while iCloud for Windows is better suited to users who keep their original photos in iCloud. If you want to transfer large numbers of photos and videos directly to an external storage device while maintaining original files, metadata, and album organization, PhotosDrive provides a more flexible photo export and backup solution.
Before deleting photos from your iPhone after a transfer, always verify that the original photos and videos have been copied successfully and can be opened from the destination storage.
| More Related Articles | ||||
 |
1. How to Edit Video and MP4 Metadata on iPhone and iPad? 2. How to Rename Photos on iPhone Without a Computer? |
|||
About Fireebok Studio
Our article content is to provide solutions to solve the technical issue when we are using iPhone, macOS, WhatsApp and more. If you are interested in the content, you can subscribe to us. And We also develop some high quality applications to provide fully integrated solutions to handle more complex problems. They are free trials and you can access download center to download them at any time.
| Popular Articles & Tips You May Like | ||||
 |
 |
 |
||
| Five ways to recover lost iPhone data | How to reduce WhatsApp storage on iPhone | How to Clean up Your iOS and Boost Your Device's Performance | ||