Many Mac users clear out storage before upgrading to macOS 27 (Golden Gate) by deleting old photos, videos, and large files. Furthermore, during a major macOS upgrade, the system automatically clears temporary caches, rebuilds system indexes, and alters storage optimization settings. Consequently, many users restart their Mac after an update only to find important photos and documents missing.
If your files or photos disappeared after updating to macOS 27 (Golden Gate), do not panic. In most cases, the data is still stored on your drive and can be retrieved.
CRITICAL WARNING: Stop using your Mac immediately if you suspect files are missing. Continued web browsing, downloading apps, or creating new documents writes new data to your drive, which can overwrite your deleted files and make recovery impossible.
Quick Checks Before Starting Data Recovery
Before running recovery software or restoring system backups, perform these essential system checks to verify if your files are truly gone or simply hidden:
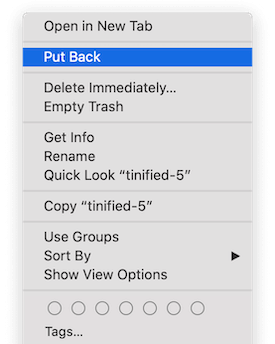
1. Check the Trash Bin: Open Trash from the Dock. If your missing files are there, right-click and select Put Back.
2. Inspect Photos "Recently Deleted": Open the Photos app, navigate to Recently Deleted in the left sidebar, select your items, and click Recover. (Note: Deleted media stays here for up to 30 days).
3. Run a Direct Finder Search: Press Command + Space to open Spotlight or use Finder (Command + F) to search by exact file name, extension (e.g., .jpg, .pdf), or date modified.
4. Verify iCloud Download Status: Your files may not be deleted—macOS 27 may have optimized your local storage, offloading files to the cloud. Look for a small cloud-with-arrow icon next to file names in Finder.
Method 1: Recover Missing Photos & Files via iCloud
If you had iCloud enabled prior to upgrading to macOS 27 (Golden Gate), your missing media and documents are likely stored safely in Apple’s cloud servers.
Step A: Recover Photos from iCloud Photos
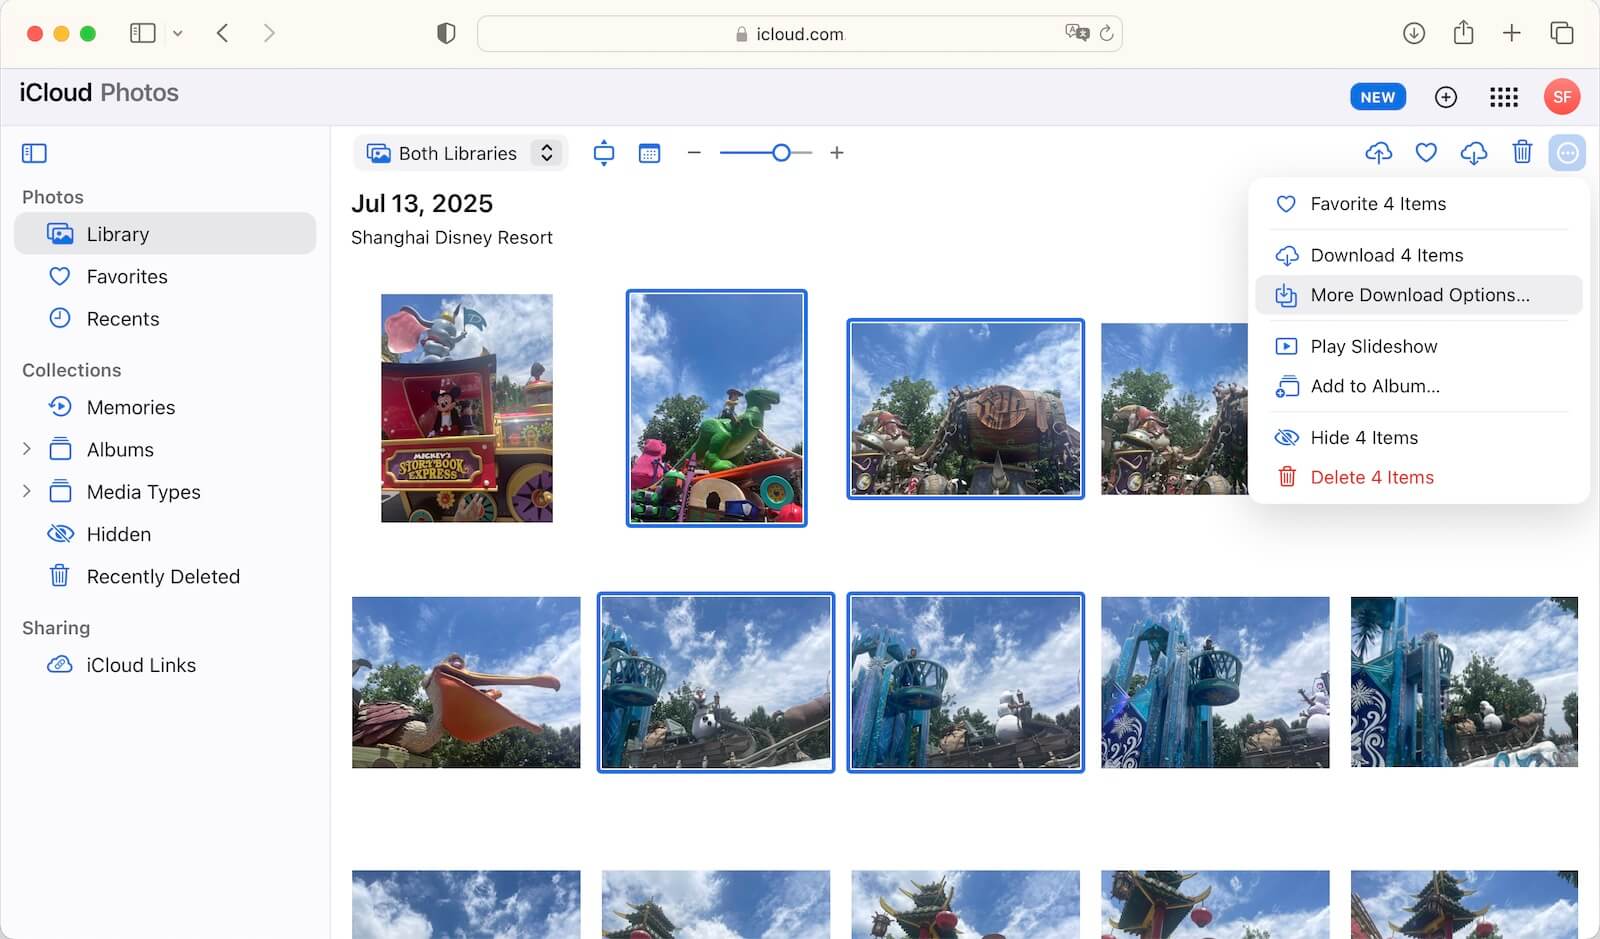
1. Launch the Photos app on your Mac. In the left sidebar, click Recently Deleted. Select the photos or videos you need and click Recover.
2. If empty: Log into iCloud.com via a browser, navigate to Photos > Recently Deleted, and check there. On your Mac, verify your sync settings: Go to System Settings > [Your Name] > iCloud > Photos and ensure Sync this Mac is toggled ON.
Tip: If Optimize Mac Storage is enabled, full-resolution photos are stored in iCloud and downloaded on demand when opened.
Step B: Restore Files from iCloud Drive
1. Open a web browser and sign into iCloud.com/drive. Click Recently Deleted in the sidebar. Select your lost files and click Restore.
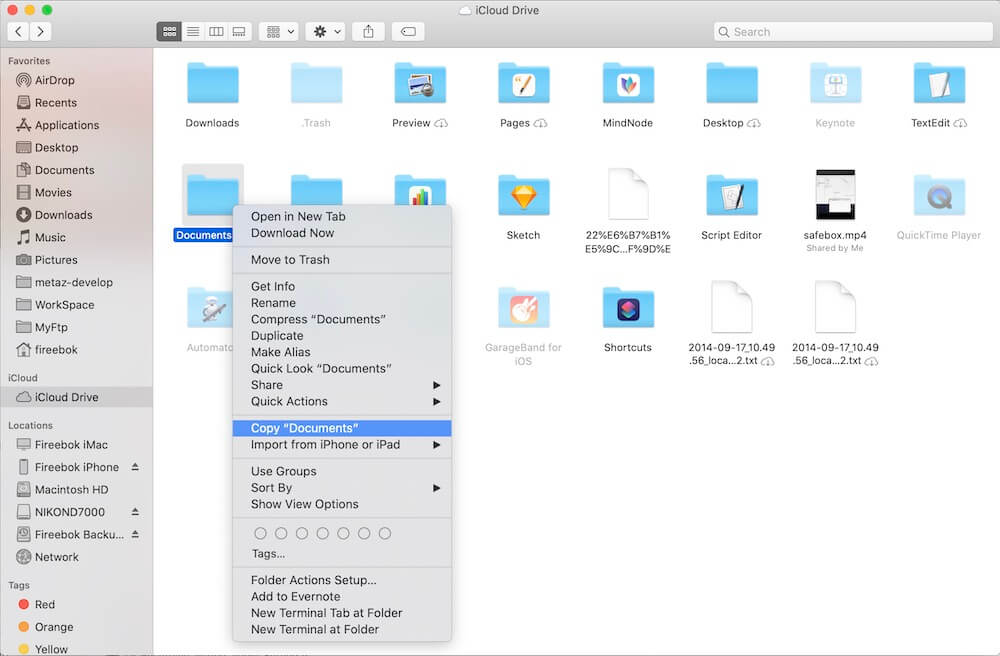
2. On your Mac, open Finder > iCloud Drive. If a file shows a cloud download icon, right-click it and choose Download Now. Ensure desktop files are syncing by checking System Settings > [Your Name] > iCloud > iCloud Drive and turning on Desktop & Documents Folders.
Method 2: Restore Data Using a Time Machine Backup
If you created a backup prior to installing macOS 27 (Golden Gate), Time Machine provides a seamless, native way to roll back your file state.
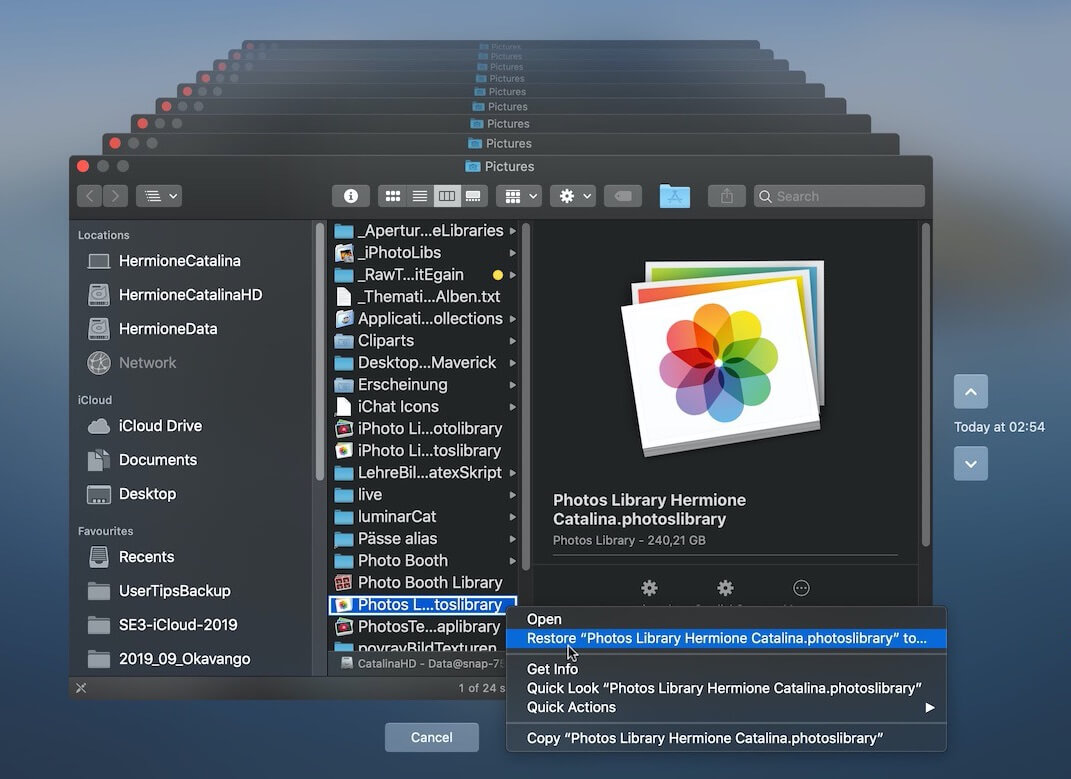
1. Connect your external Time Machine backup drive to your Mac. Go to System Settings > General > Time Machine. Click Browse Time Machine Backups (or click the Time Machine icon in the menu bar).
2. Navigate through the timeline on the right side of the screen to choose a snapshot date before your files disappeared. Select the missing files or folders and click Restore.
Full System Restore Note: If you need to recover your entire system state, restart your Mac into Recovery Mode (hold Command + R on Intel Macs, or hold the Power Button on Apple Silicon Macs), then select Restore from Time Machine Backup. Ensure you backup any newly created files first.
Method 3: Recover Files with Fireebok Data Recovery (No Backup Needed)
If you don't have an iCloud or Time Machine backup, using professional Mac data recovery software is your best remaining option. Fireebok Data Recovery scans your drive at a low level to locate lost partition fragments, deleted file pointers, and unlinked photos.
Step-by-Step Data Recovery Process:
1. Download & Install: Download Fireebok Data Recovery from the official website. (Best Practice: Install and run the software from a second Mac or external drive to avoid overwriting deleted data on your main drive).
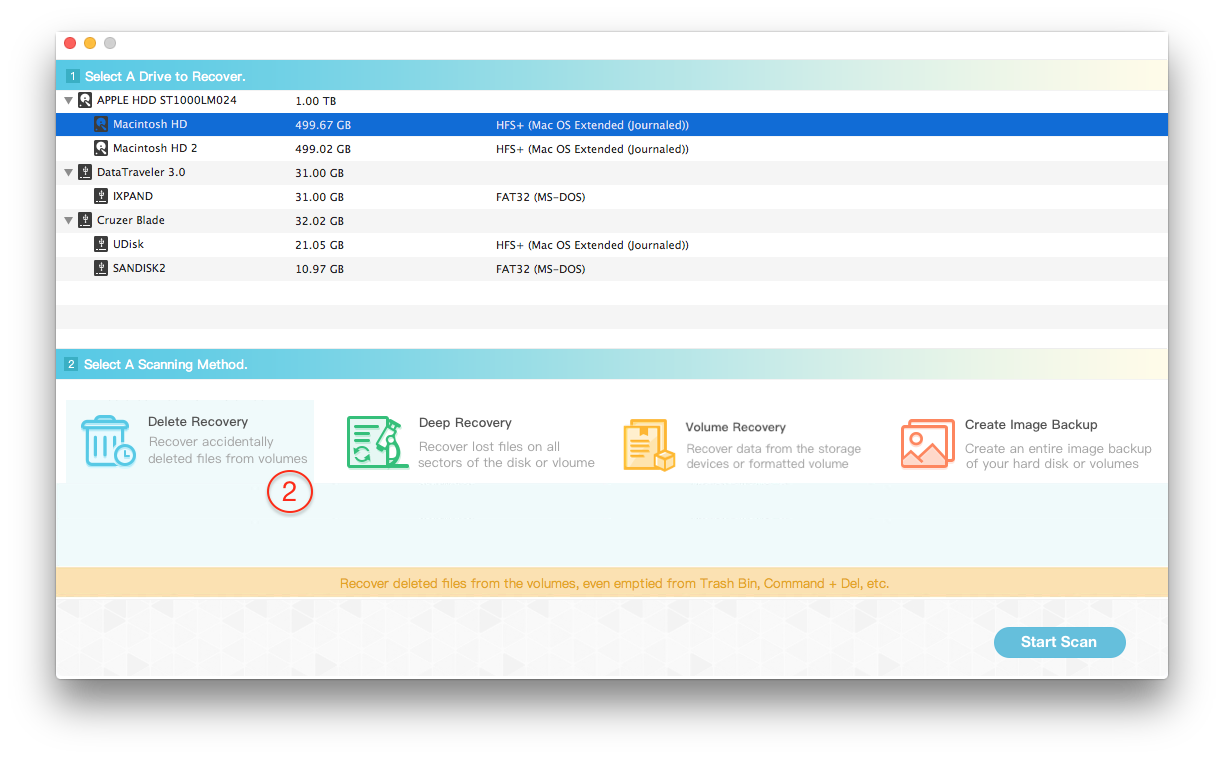
2. Launch & Select Drive: Open Fireebok Data Recovery and select the drive location where your files were lost (e.g., Internal Mac SSD, External Hard Drive, or SD Card).
3. Initiate Scan: Click Delete Recovery mode, and then click Start Scan to run a initial check. If your files do not appear right away, initiate a Deep Recovery Scan to search for unlinked raw file signatures.
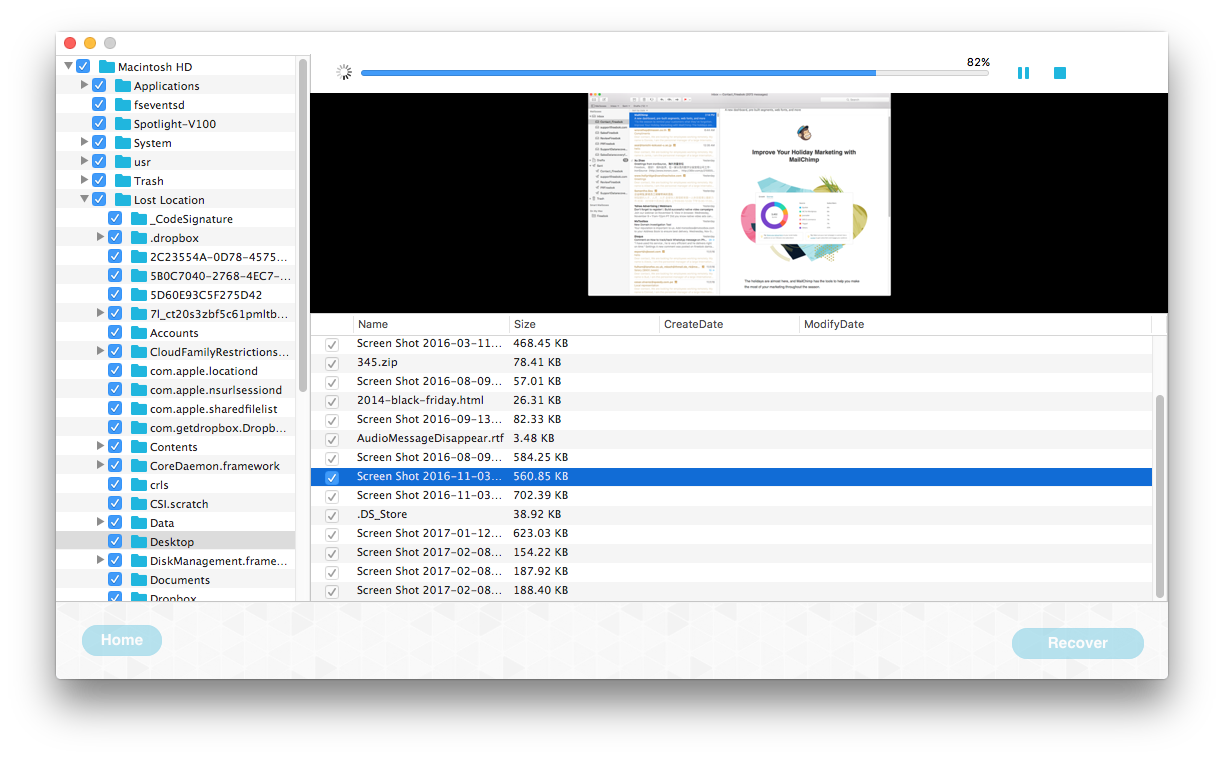
4. Preview & Verify: Use the built-in preview feature to verify recoverable photos, videos, and documents.
5. Recover Data Safely: Select the missing items and click Recover.
IMPORTANT: Always save recovered files to an external drive or secondary storage device—never back onto the partition you are recovering from. Writing recovered data back to the same drive can permanently corrupt the remaining unrecovered files.
Why Did Files Disappear After Updating to macOS 27 (Golden Gate)?
Understanding why data disappears helps prevent future incidents. The most common causes include:
1. Storage Optimization: macOS automatically offloaded local files to iCloud Drive to clear required space for the update package.
2. Accidental Deletion: Files were manually deleted while attempting to free up disk space before initiating the update.
3. Cache Clears & System Indexing: Temporary caches were wiped, causing Spotlight or Finder to temporarily fail to index existing files.
4. Interrupted Update Process: A freeze, power outage, or system crash during the macOS installation corrupted local file system pointers.
5. Permission Changes: System security updates modified directory access rights, making user folders hidden.
How to Prevent Data Loss on macOS in the Future
Protect your Mac against future update issues with these preventive habits:
1. Automate Time Machine Backups: Keep an external hard drive connected for automatic hourly backups.
2. Maintain the 3-2-1 Rule: Keep 3 copies of important data across 2 different media types, with 1 offsite (e.g., iCloud + External SSD).
3. Maintain Adequate Free Storage: Always keep at least 15–20% of your Mac internal SSD free before running major OS upgrades.
4. Safely Eject Media: Always unmount external storage drives correctly before disconnecting them.
Final Thoughts
Losing important files after updating to macOS 27 (Golden Gate) can be frustrating, but your data is rarely gone forever. Start with free native options like iCloud Drive and Time Machine. If those fail, run a scan using Fireebok Data Recovery as soon as possible before new system activity overwrites your missing files.
| More Related Articles | ||||
 |
1. How to merge two photo libraries on Mac? 2. How to find and remove duplicate photos from Photos? |
|||
About Fireebok Studio
Our article content is to provide solutions to solve the technical issue when we are using iPhone, macOS, WhatsApp and more. If you are interested in the content, you can subscribe to us. And We also develop some high quality applications to provide fully integrated solutions to handle more complex problems. They are free trials and you can access download center to download them at any time.
| Popular Articles & Tips You May Like | ||||
 |
 |
 |
||
| Five ways to recover lost iPhone data | How to reduce WhatsApp storage on iPhone | How to Clean up Your iOS and Boost Your Device's Performance | ||