After upgrading to macOS Tahoe, many Mac users have reported audio glitches, especially when using HDMI or Thunderbolt displays, soundbars, or TVs. The problem does not occur when playing audio through built-in Mac speakers or Bluetooth devices.
This issue affects popular apps such as Apple Music, Spotify, Skype, WhatsApp, Zoom, and others. If you're experiencing crackling, stuttering, delayed audio, or sudden drop-outs after upgrading to macOS Tahoe, this guide will show you the most effective solutions.
1. Restart CoreAudio
macOS uses a background process called CoreAudio to manage all system audio. Restarting it can instantly fix temporary glitches. Steps:
1. Open Terminal (located in Applications → Utilities). Enter the following command: sudo pkill coreaudiod
2. Press Return and enter your Mac password. CoreAudio will restart automatically
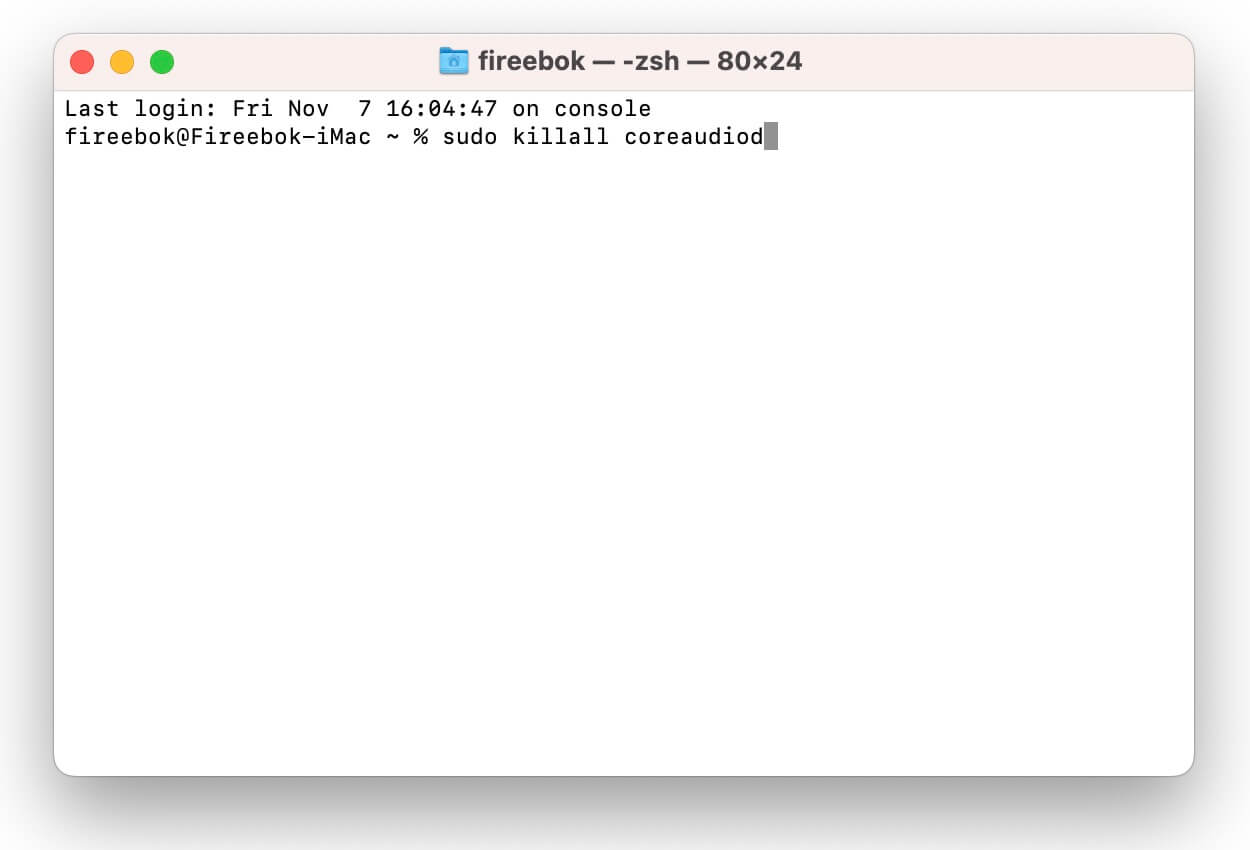
This is a temporary fix, but it often restores normal sound immediately.
2. Quit Xcode and Simulator
Several developers have reported that audio glitches disappear after closing Xcode and the iOS Simulator. If either application is currently running, follow these steps:
1. Quit Xcode and Simulator app.
2. Test your audio output again over HDMI or Thunderbolt
Many users confirmed that once Xcode and the Simulator are no longer active, audio playback returns to normal.
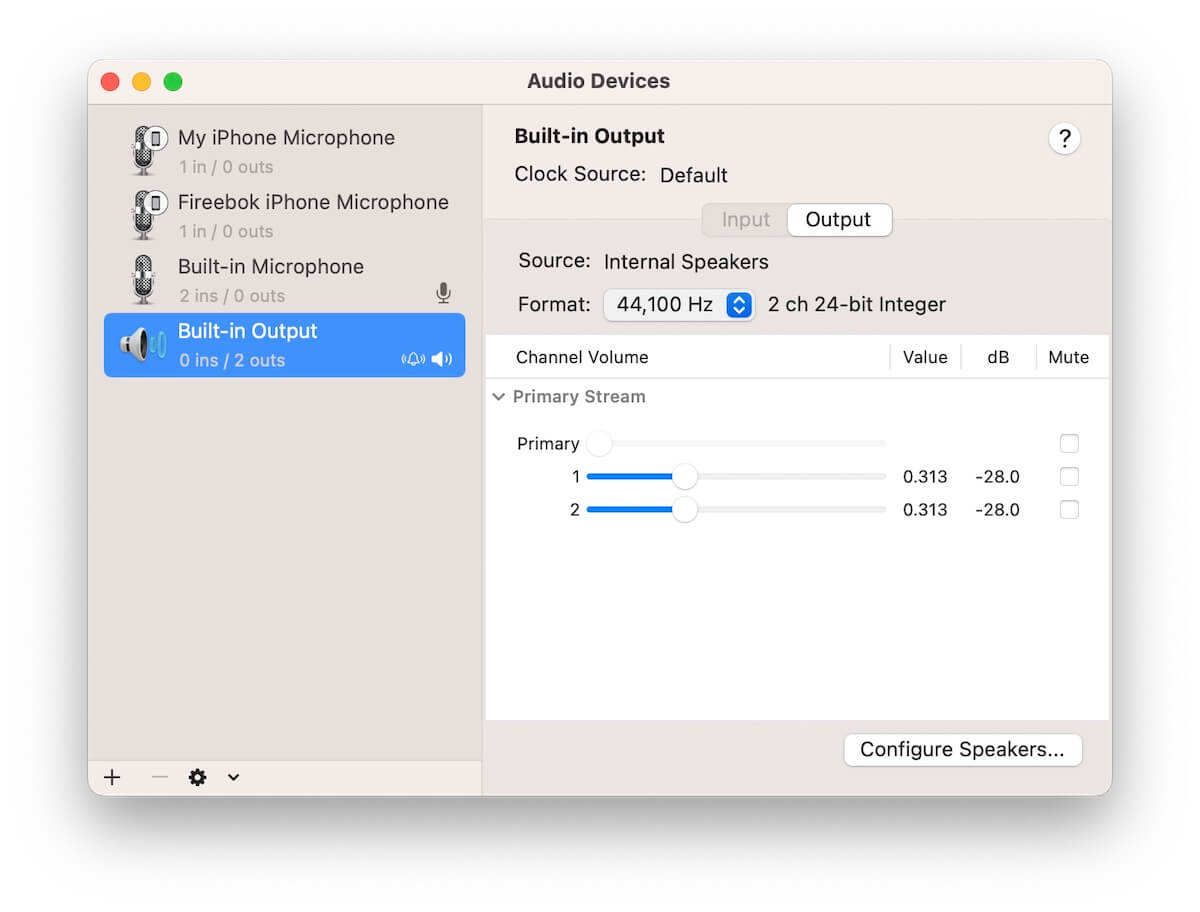
3. Change Audio MIDI Setup Settings
The issue may be caused by incorrect output frequency or channel format. To adjust settings:
1. Open Audio MIDI Setup (Applications → Utilities). Select your HDMI/Thunderbolt output device
2. Change Format sample rate (e.g., from 48,000 Hz to 44,100 Hz or vice versa). Test playback
Sometimes switching sample rates forces macOS to reinitialize audio output.
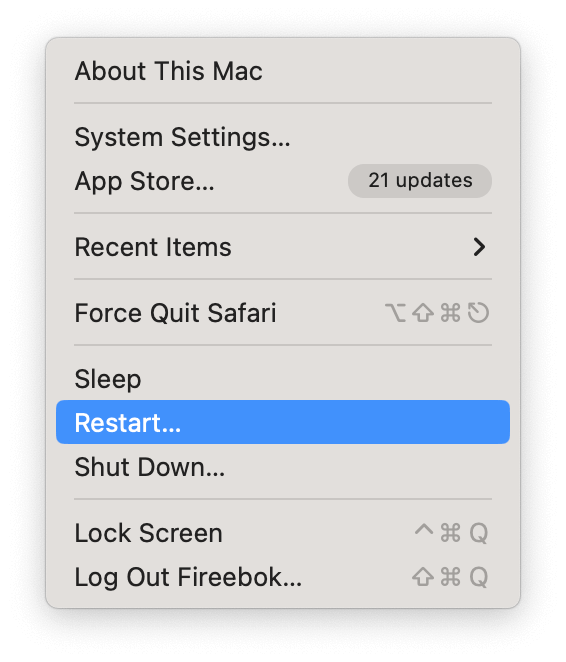
4. Restart Your Mac
A simple restart clears macOS audio caches and may fix HDMI/TB glitches. Go to: Apple menu → Restart
This is especially helpful if the problem started after sleep or wake.
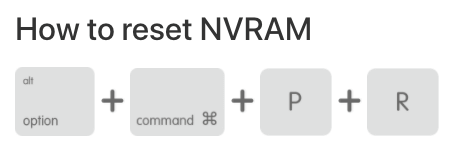
5. Reset NVRAM
NVRAM stores system settings including audio volume, display output, time zone, and kernel logs. Resetting it can fix macOS audio routing issues.
How to Reset NVRAM:
1. Shut down your Mac
2. Turn it on and immediately hold: Option + Command + P + R
3. Keep holding the keys for about 20 seconds. Release the keys after the Apple logo appears or after the second startup chime (on older Intel Macs)
6. Check for macOS Updates
Apple may release hotfix updates for macOS Tahoe sound bugs. To update macOS:
1. Go to System Settings → General → Software Update
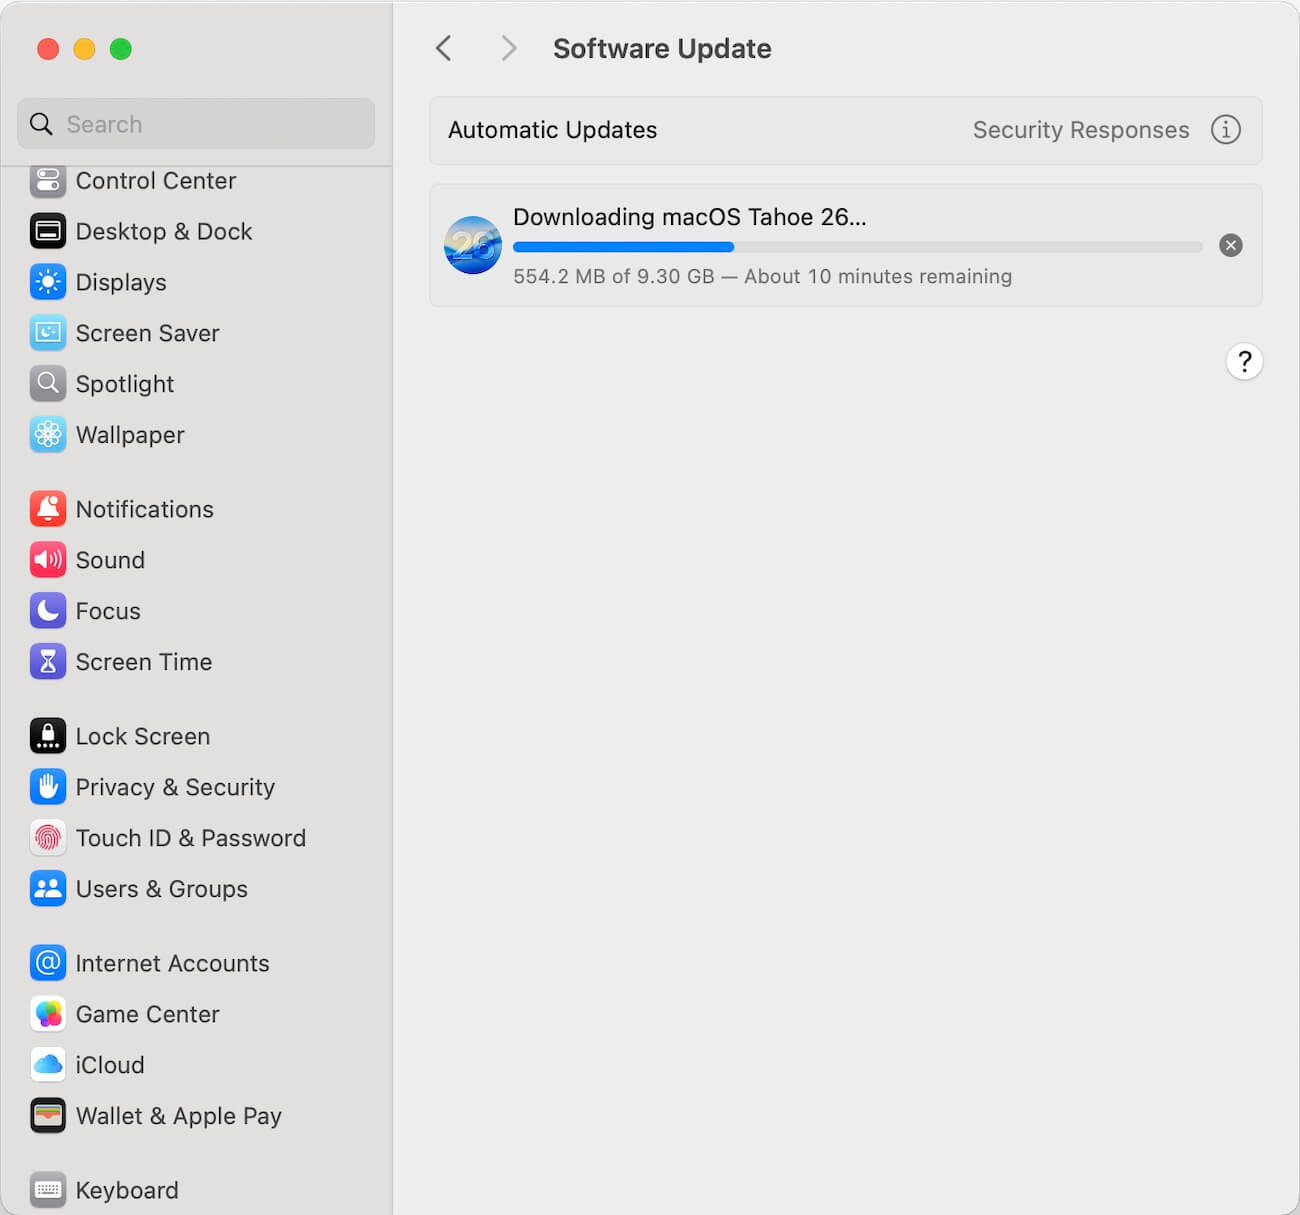
2. Scroll down to Other Updates Available. Install any pending macOS updates or audio firmware patches
Final Tips
1. Try different HDMI cables or ports
2. Test with another display or soundbar
3. Switch between stereo and multi-channel modes in Audio MIDI Setup
4. If the issue appeared only after macOS Tahoe, consider reporting it to Apple Feedback Assistant
Conclusion
Audio glitches after installing macOS Tahoe are often caused by CoreAudio issues, audio routing bugs, or incompatible sample rates. Restarting CoreAudio, adjusting Audio MIDI settings, quitting Xcode, and updating macOS are the most effective fixes.
If none of the above solutions work, the problem may be a macOS bug that Apple must patch in a future update.
| More Related Articles | ||||
 |
1. How to merge two photo libraries on Mac? 2. How to find and remove duplicate photos from Photos? |
|||
About Fireebok Studio
Our article content is to provide solutions to solve the technical issue when we are using iPhone, macOS, WhatsApp and more. If you are interested in the content, you can subscribe to us. And We also develop some high quality applications to provide fully integrated solutions to handle more complex problems. They are free trials and you can access download center to download them at any time.
| Popular Articles & Tips You May Like | ||||
 |
 |
 |
||
| Five ways to recover lost iPhone data | How to reduce WhatsApp storage on iPhone | How to Clean up Your iOS and Boost Your Device's Performance | ||