When upgrading to a new Mac, many users want to copy or transfer their Photos library from the old Mac. Most online guides simply suggest copying the Photos Library.photoslibrary file from the ~/Pictures folder to the new Mac. At first glance, that seems enough—but in reality, it often isn’t.
Here’s why: not all original photos and videos are stored inside the Photos Library package. If your old Photos Library uses referenced files, or if you have iCloud Photos with Optimize Mac Storage enabled, the library may only contain thumbnails instead of full-resolution originals. Copying the library in this state means you’re only transferring previews, which leads to missing photos or videos on the new Mac.
If you want to make sure every original photo and video is copied to your new MacBook, follow this step-by-step guide.
Step 1: Check for Referenced Files
Referenced files are photos and videos stored outside the Photos Library (for example, in local folders or on an external hard drive).
1. Open the Photos app on your old Mac. Go to Photos -> Settings -> General. Check whether “Copy items to the Photos library” is enabled.
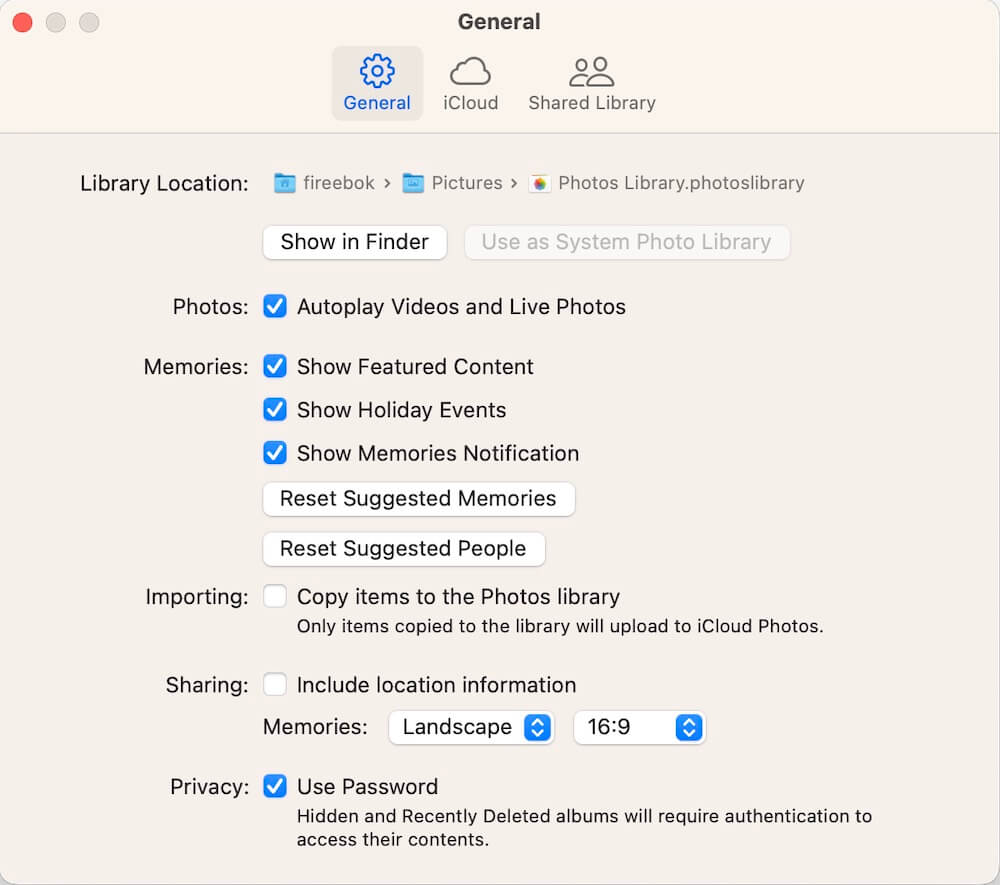
Even if this option is currently disabled, your Photos library may contain referenced files from previous imports. To locate these referenced files, you can use a third-party tool like Photo Exifer:
1. Download and install Photo Exifer on your Mac. Click Photo Library tab and load all photos and videos.
2. Use the filter “Showing: All Referenced Photos in the Photo Library” to list all referenced items.
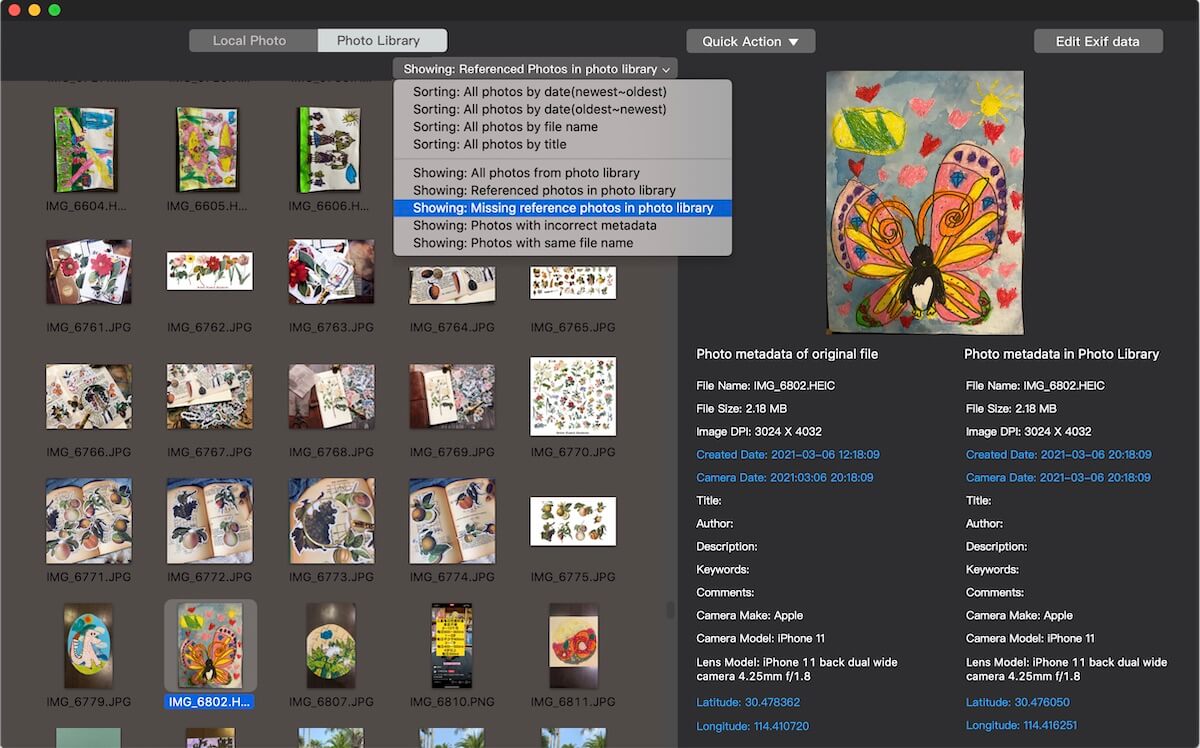
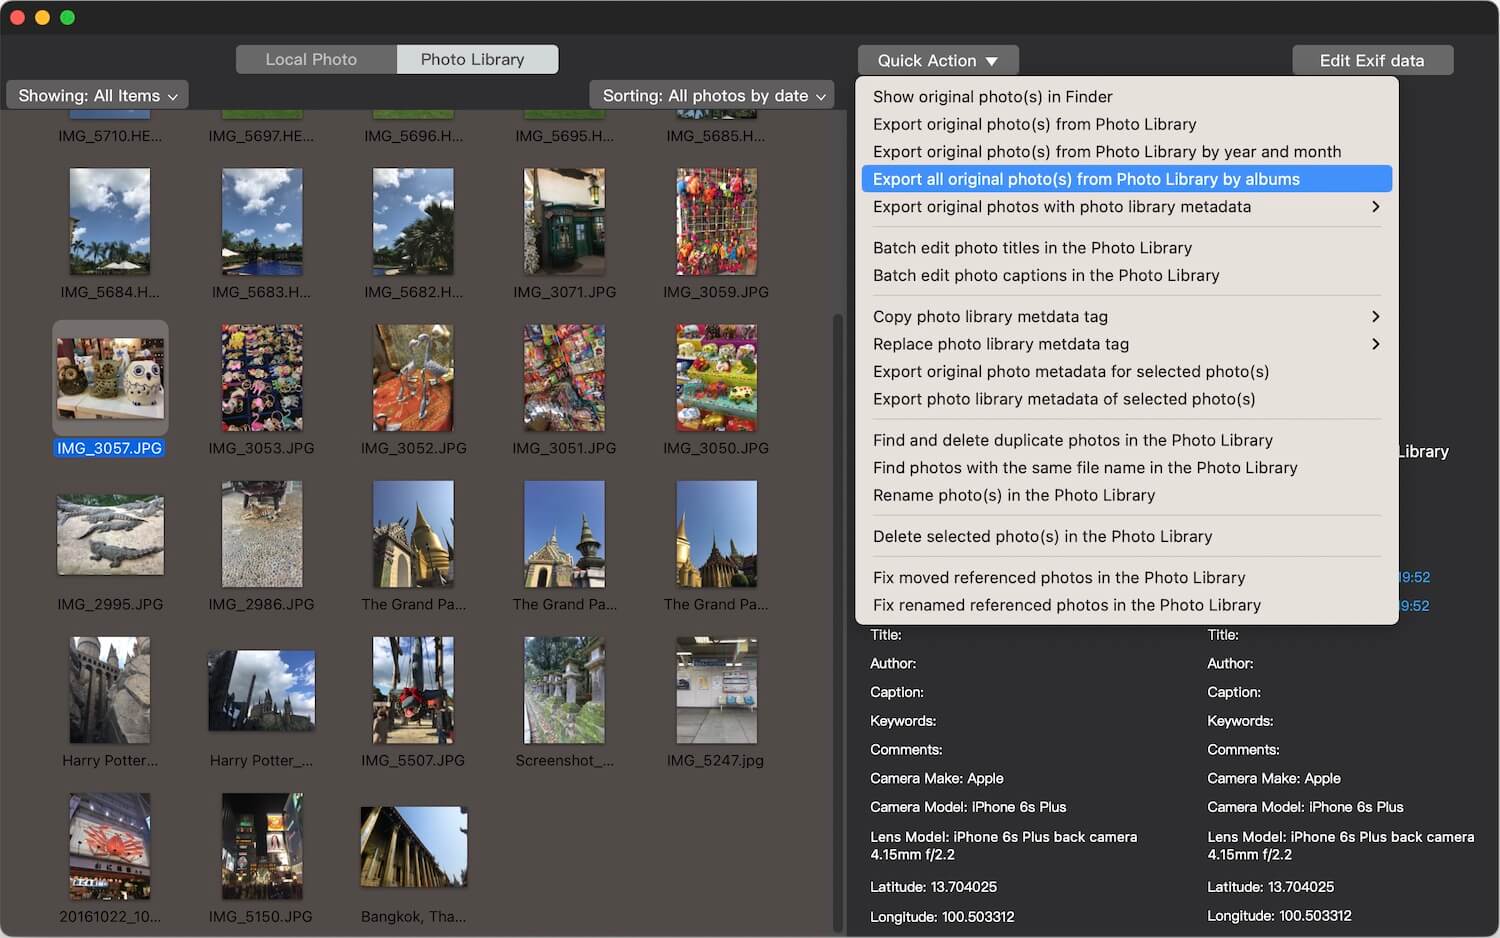
3. Select them and go to Quick Action -> Export Original Photos from Photo Library.
Tip: If your library has missing or broken referenced file links, Photo Exifer can also help you find and repair lost connections.
Step 2: Check for iCloud Photos
If you use iCloud Photos, some files may only exist in iCloud and not on your Mac—especially if Optimize Mac Storage is enabled.
1. On your old Mac, open Photos application, go to Settings -> iCloud -> iCloud Photos.
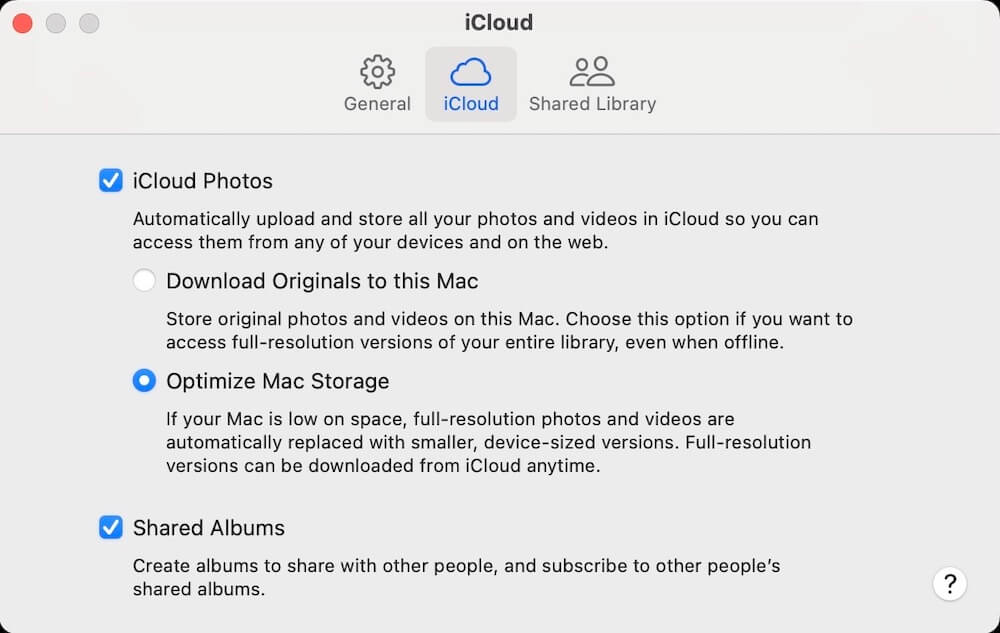
2. Check if iCloud Photos is turned on and whether Optimize Mac Storage is enabled.
# If iCloud Photos is off, you don’t need this step.
# If it’s on, you must make sure all iCloud photos are fully downloaded.
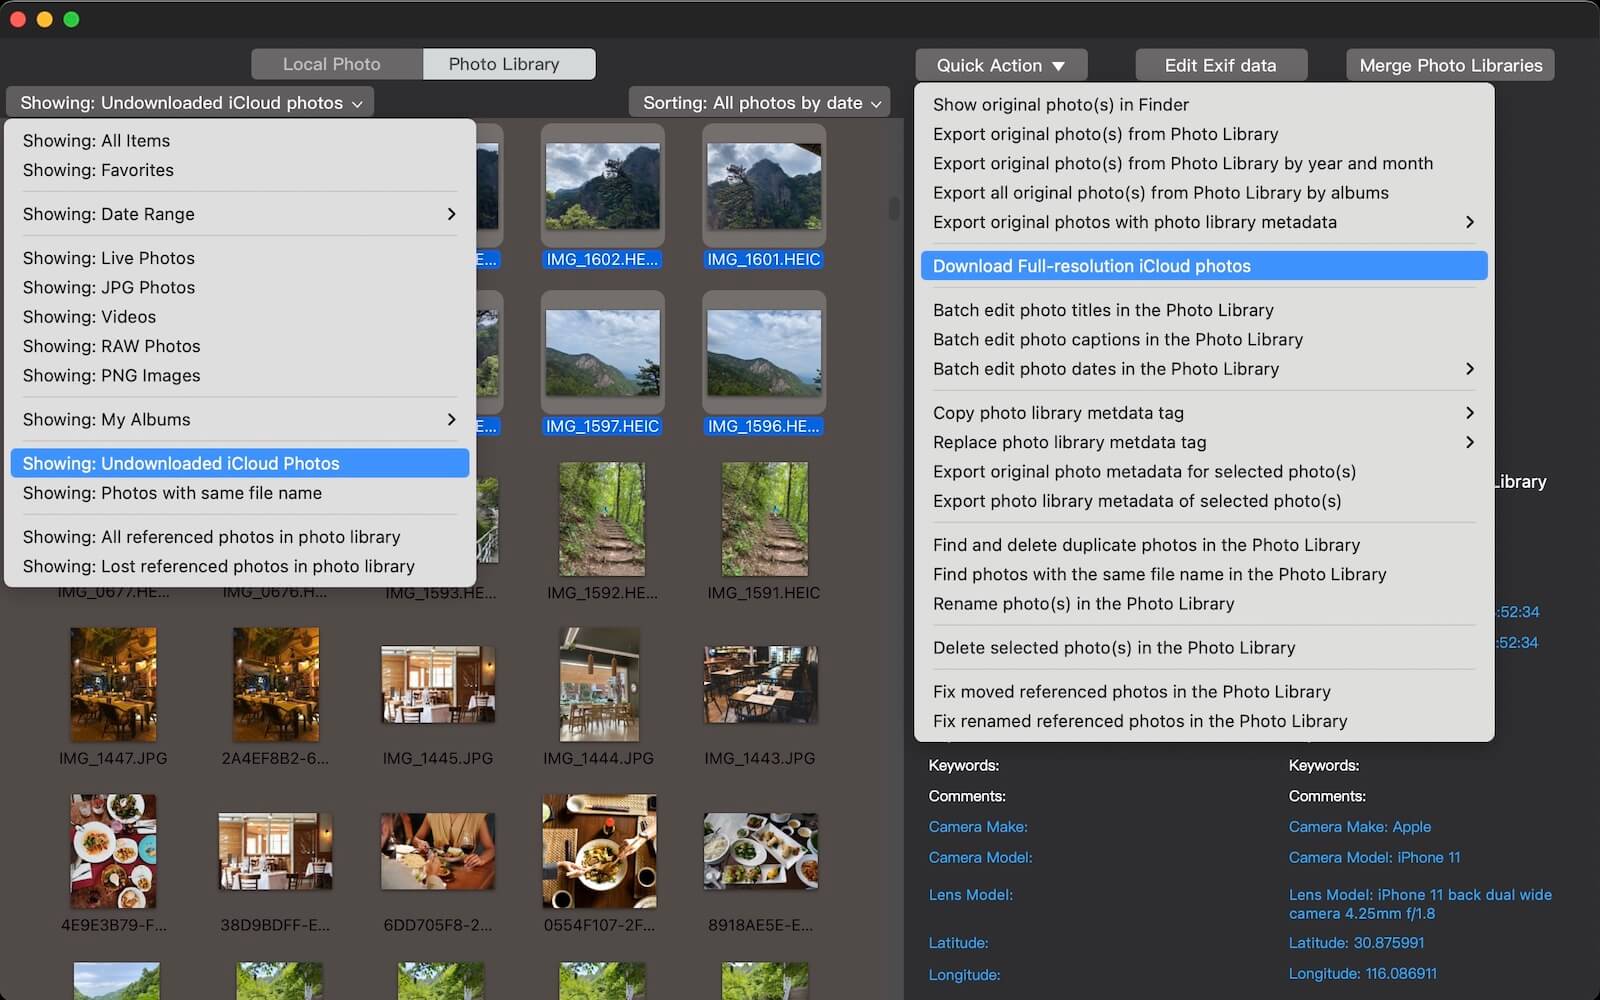
Unfortunately, the Photos app doesn’t provide an easy way to see which files aren’t downloaded. With Photo Exifer, you can:
1. Open Photo Exifer and load your Photo Library. Use the filter “Undownloaded iCloud Photos” to display photos not saved locally.

2. Select them and go to Quick Action -> Download Full-resolution iCloud Photos. This ensures you have full-quality versions of all iCloud photos before transferring.
Step 3: Copy the Photos Library to the New Mac
Once you’ve exported referenced originals and downloaded all iCloud photos, you can safely copy the library:
1. Copy your Photos Library.photoslibrary package and any exported originals to an external hard drive.
2. Move them to your new Mac. Place the Photos Library in the ~/Pictures folder (or any location you prefer).
Step 4: Manage or Merge Photo Libraries
If your new Mac already has a Photos library, you’ll now have two libraries. You can:
1. Keep both and open whichever you need.
2. Merge them into one library.
Apple Photos allows you to import from one library into another, but this may cause loss of albums or metadata. For a safer option, you can use Photo Exifer’s Merge Photo Library feature:
1. Open Photo Exifer and click Merge Photo Libraries. Use the + button to add both libraries.
2. Choose your system Photos Library as the destination. Click Start Merge Photo Library to combine them.
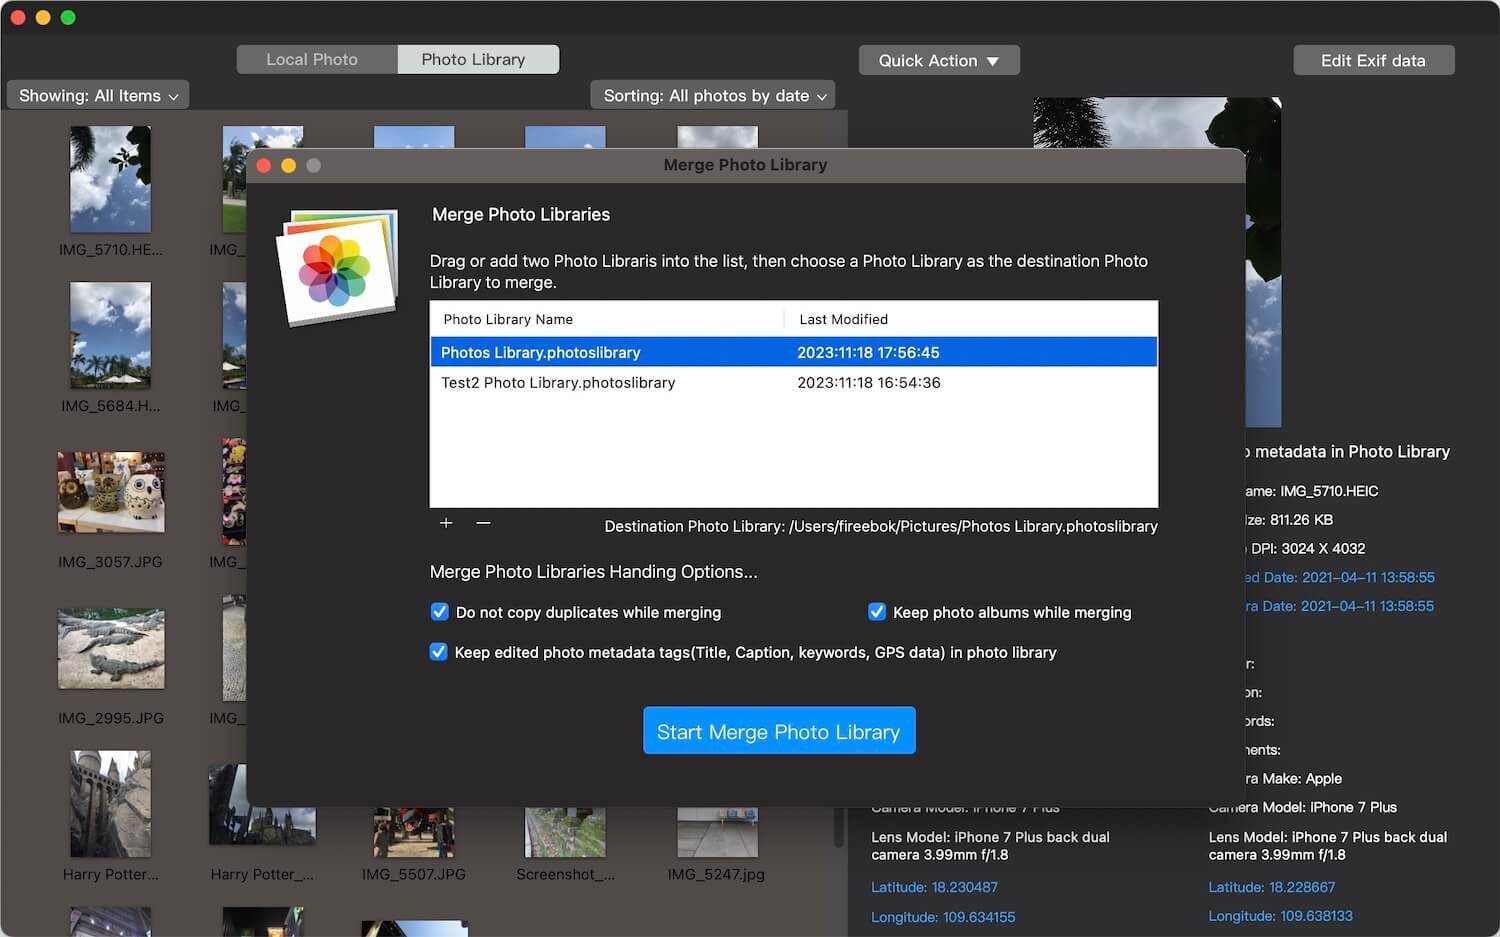
This method preserves albums, metadata, and avoids duplicates.
Final Thoughts
Copying a Photos Library to a new MacBook is more than just dragging and dropping the Photos Library.photoslibrary file. If you use referenced files or iCloud Photos with optimization, you risk losing originals. By carefully checking your setup and using tools like Photo Exifer, you can ensure every photo and video is transferred safely—without losing quality, metadata, or albums.

About Fireebok Studio
Our article content is to provide solutions to solve the technical issue when we are using iPhone, macOS, WhatsApp and more. If you are interested in the content, you can subscribe to us. And We also develop some high quality applications to provide fully integrated solutions to handle more complex problems. They are free trials and you can access download center to download them at any time.
| Popular Articles & Tips You May Like | ||||
 |
 |
 |
||
| Five ways to recover lost iPhone data | How to reduce WhatsApp storage on iPhone | How to Clean up Your iOS and Boost Your Device's Performance | ||