Old printed photos can fade or become damaged over time due to changes in temperature, humidity, and daily handling. One of the best ways to preserve these valuable memories is to digitize them. By scanning your old paper photos and saving them on your Mac, you can easily back them up, organize them, and share them with family and friends on social media or mobile devices anytime.
This guide explains everything you need, plus clear steps on how to scan old photos onto your Mac and add metadata so your digital memories stay organized for years.
What You Need to Prepare
Before you begin, make sure you have:
1. A Scanner or All-in-One Printer
Any flatbed scanner or printer with a built-in scanner will work. Ensure it is powered on and functioning properly.
2. A Mac Computer
Your Mac must be connected to the scanner — either directly via USB or through the same Wi-Fi network.
1. How to Scan Photos Using a Scanner or Printer
Step 1: Connect Your Scanner to Your Mac
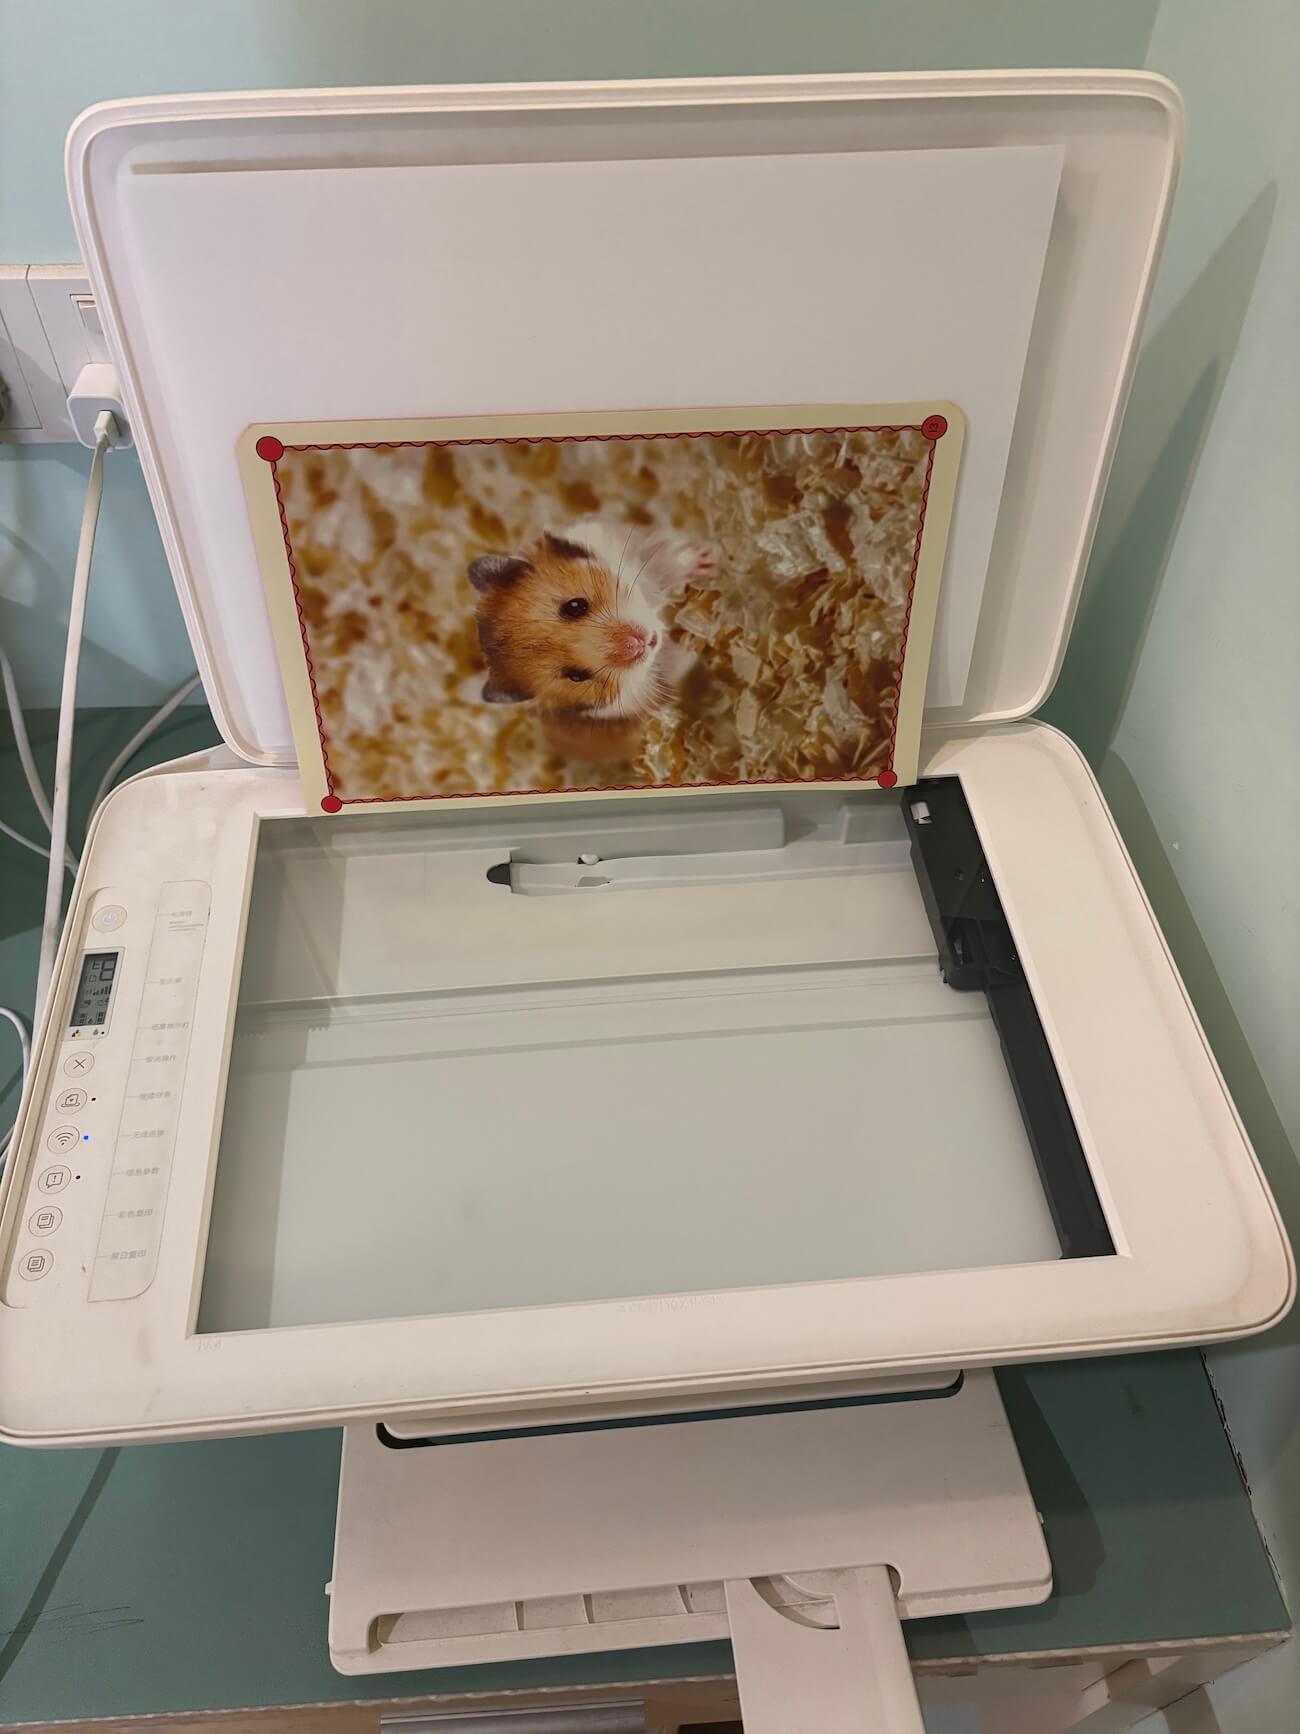
Ensure your scanner or all-in-one printer is properly connected. Place the photo flat and centered on the scanner glass.
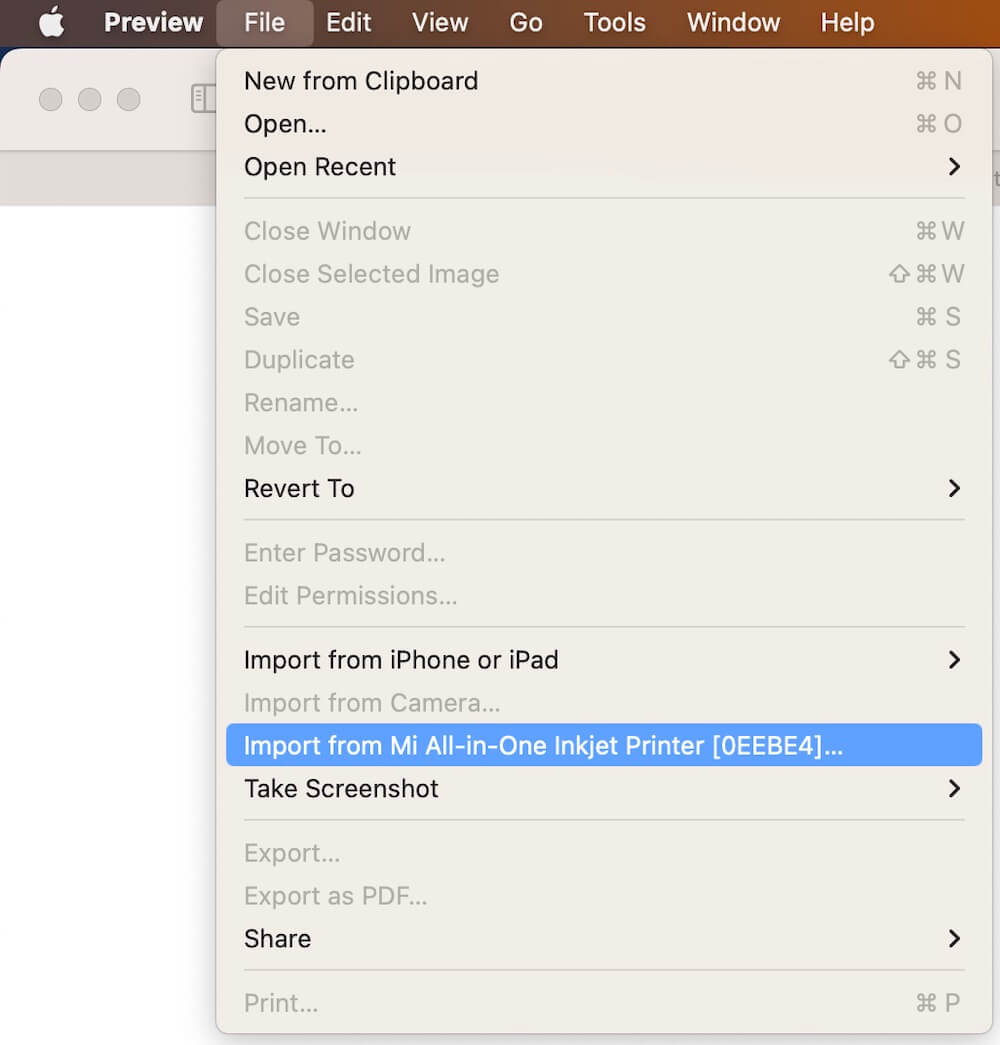
Step 2: Open the Preview App
On your Mac, open Preview → go to File → Import from [Your Scanner Name].
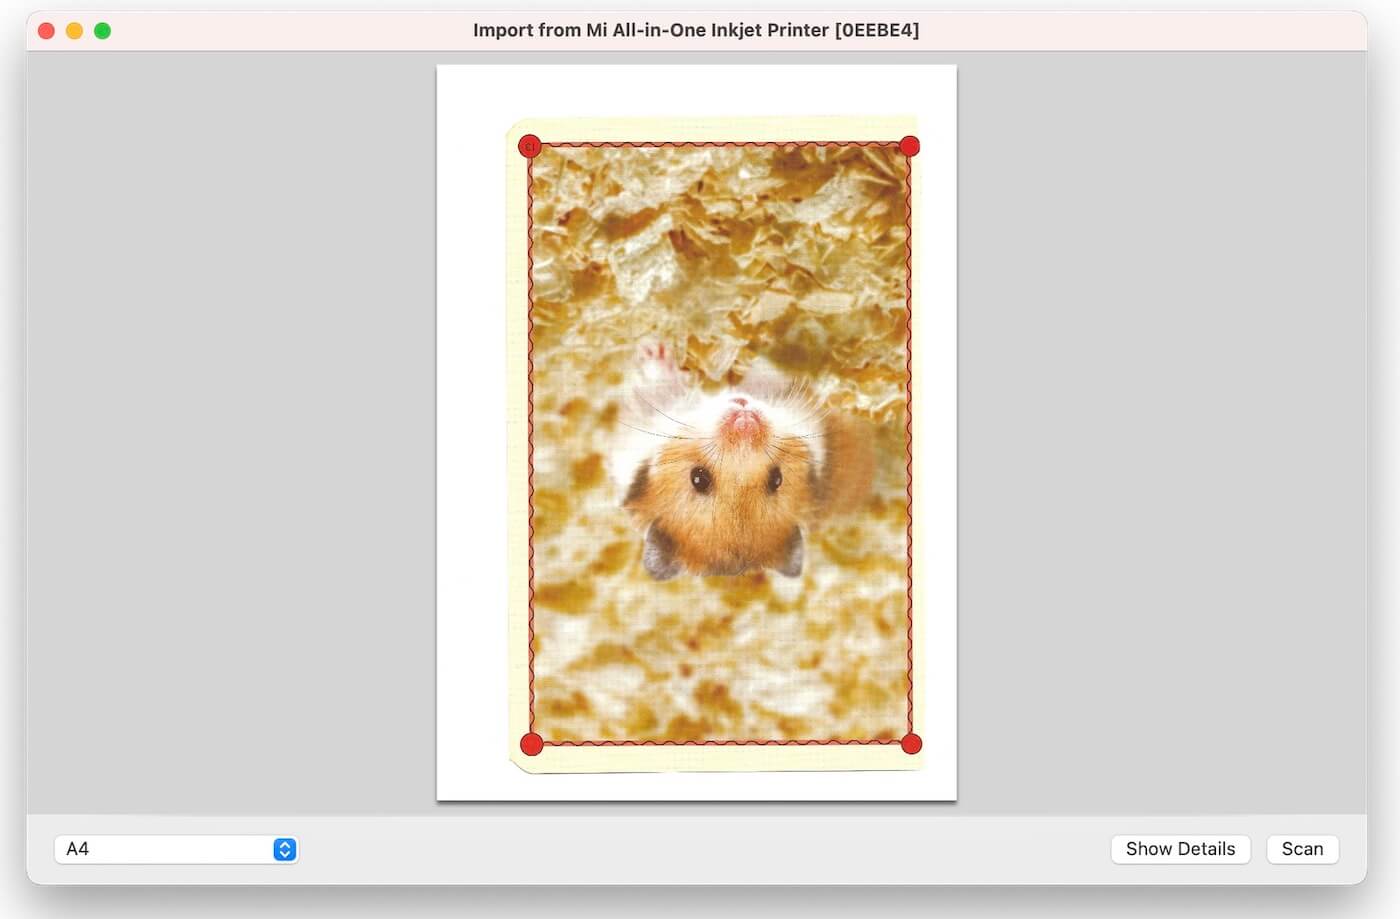
Step 3: Start the Scan
In the scanner preview window, adjust any settings if needed (color mode, resolution, etc.), then click Scan.
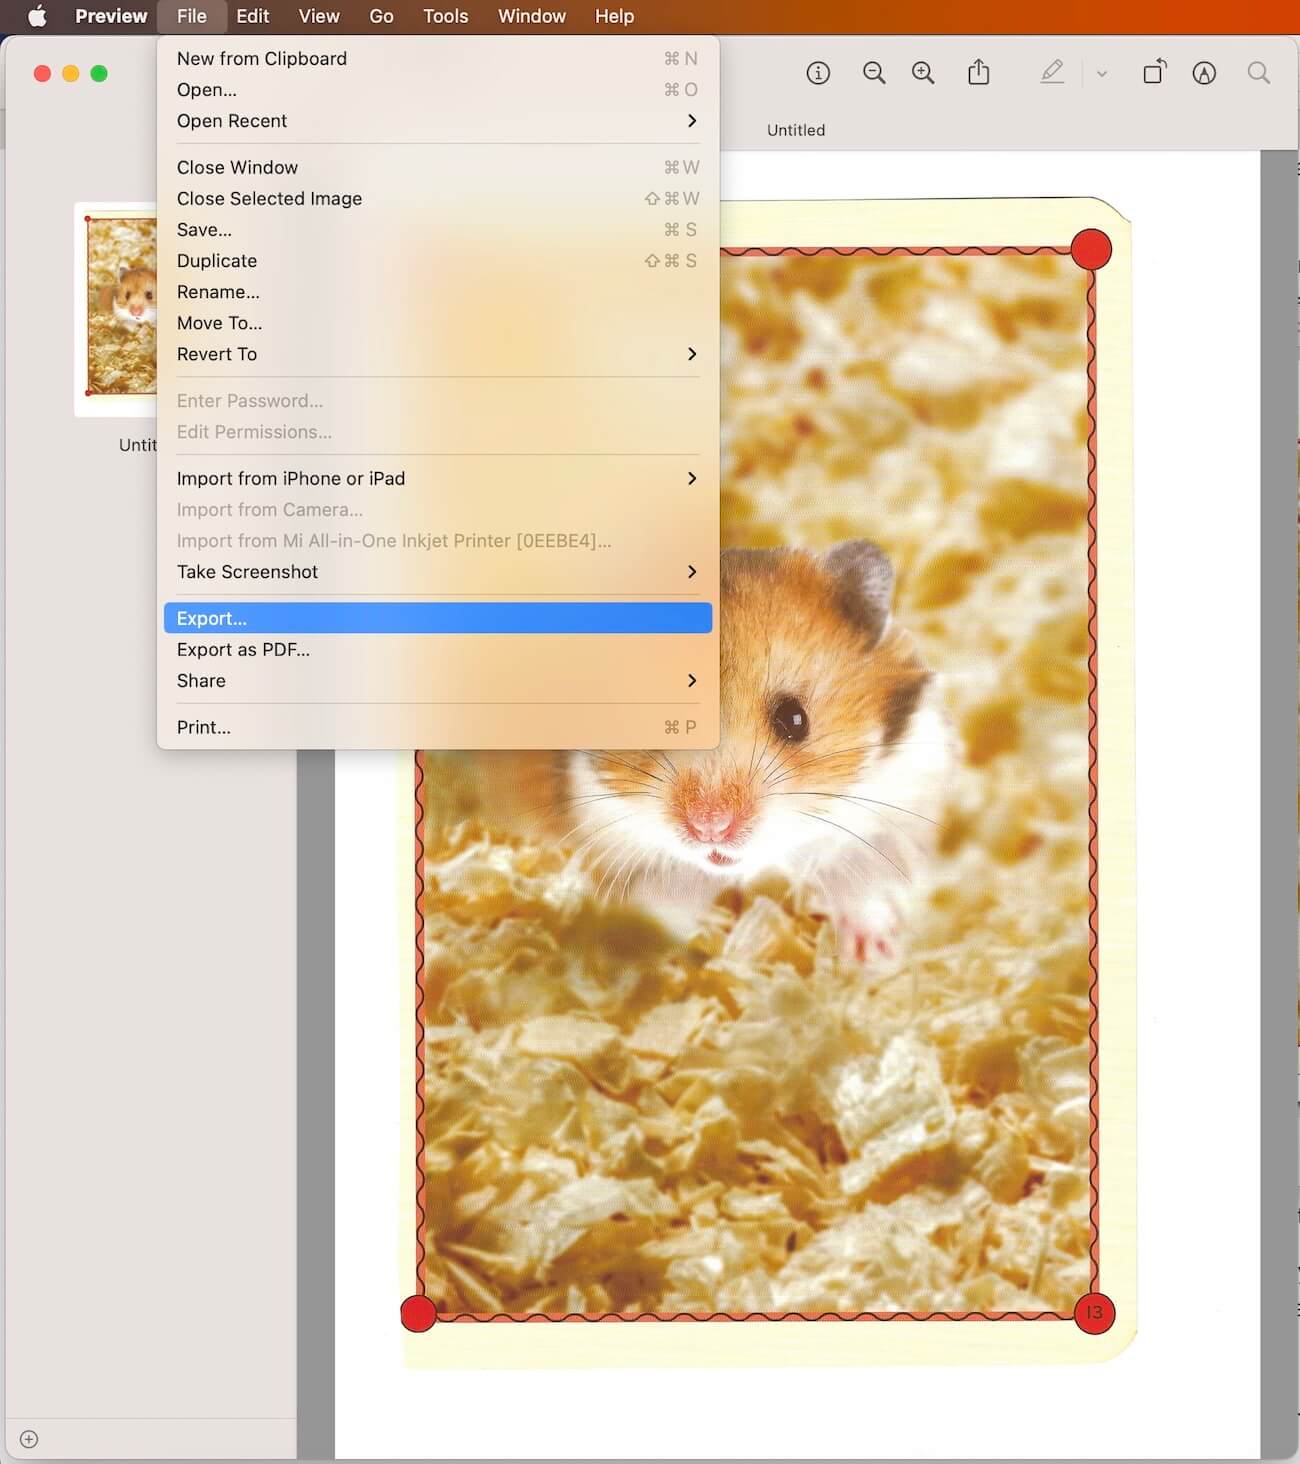
Step 4: Save the Scanned Image
Once the scan is finished, the photo will open automatically in Preview. You can rotate or adjust it if needed.
To save the image:
Go to File → Export, enter a name for the photo, select JPEG as the format and choose a folder to save it.
You have now successfully digitized your old paper photo on your Mac.
If you want to add additional information — such as when the photo was taken, where it was taken, or personal notes — continue to the next section.
2. Add Photo Metadata to Your Scanned Photos
Modern digital photos contain metadata such as:
• Creation date
• GPS location
• Title
• Keywords
• Caption / Description
• Camera information and more
Adding metadata to your scanned photos helps future generations understand the story behind the image, even if the original context is forgotten.
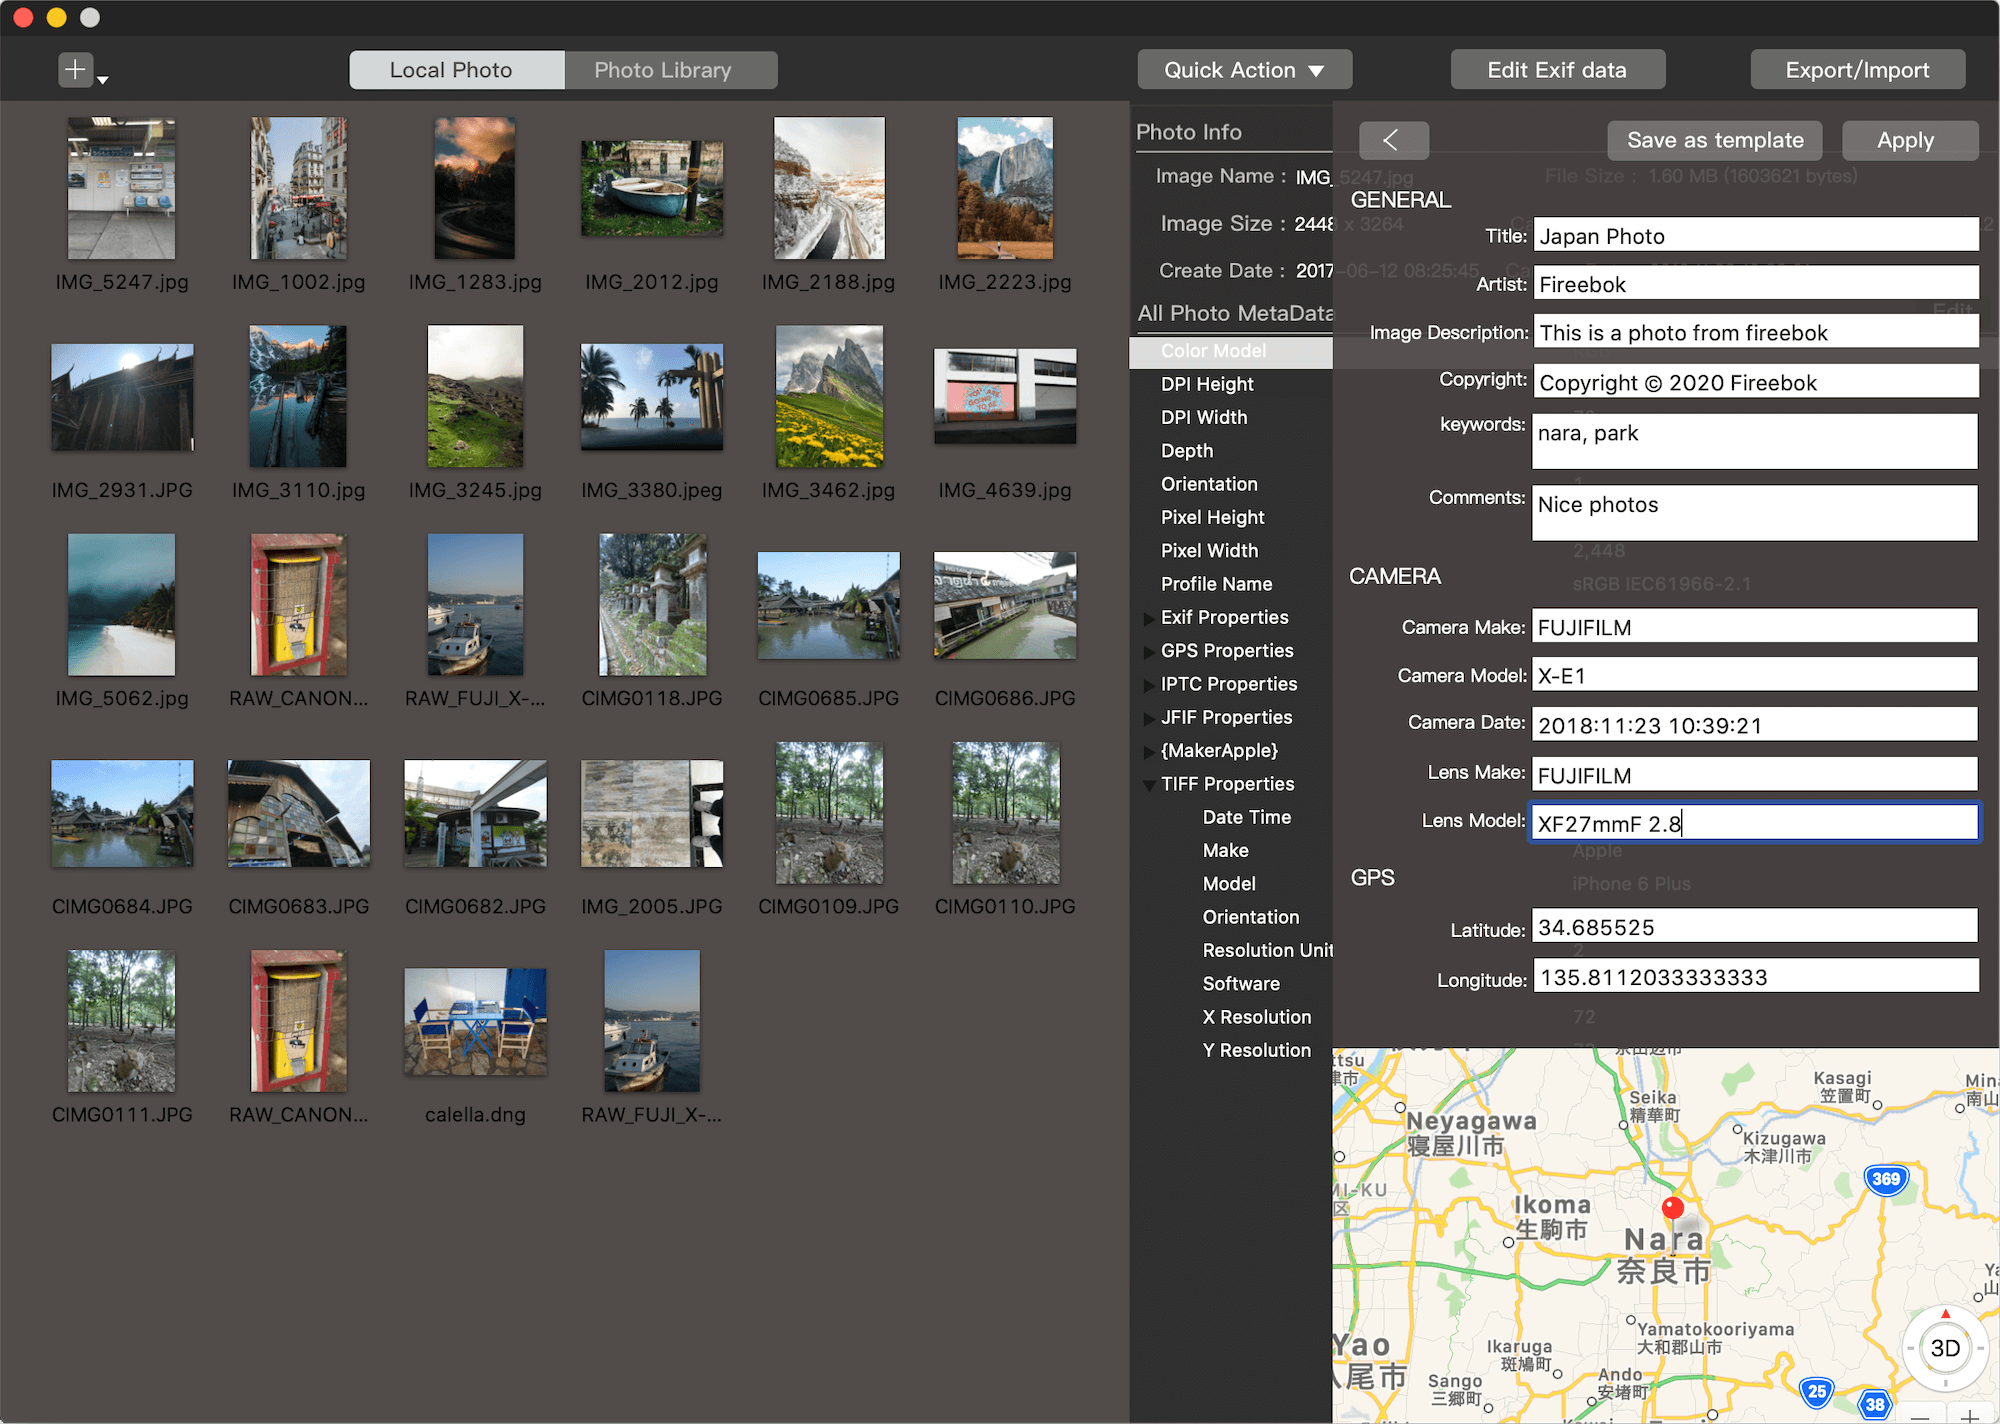
To batch edit metadata on your Mac, you can use Photo Exifer, a powerful photo metadata editor for both local photos and the macOS Photos Library.
How to Add Metadata with Photo Exifer
1. Download and install Photo Exifer on your Mac.
2. Import your scanned photos into the app, Select one or multiple photos in Photo Exifer, click Edit EXIF Data.
3. Add or edit: Photo creation date, GPS coordinates (you can get latitude/longitude from Google Maps), Photo caption / description, Keywords, other EXIF, IPTC, and metadata tags, click Apply to save the changes.
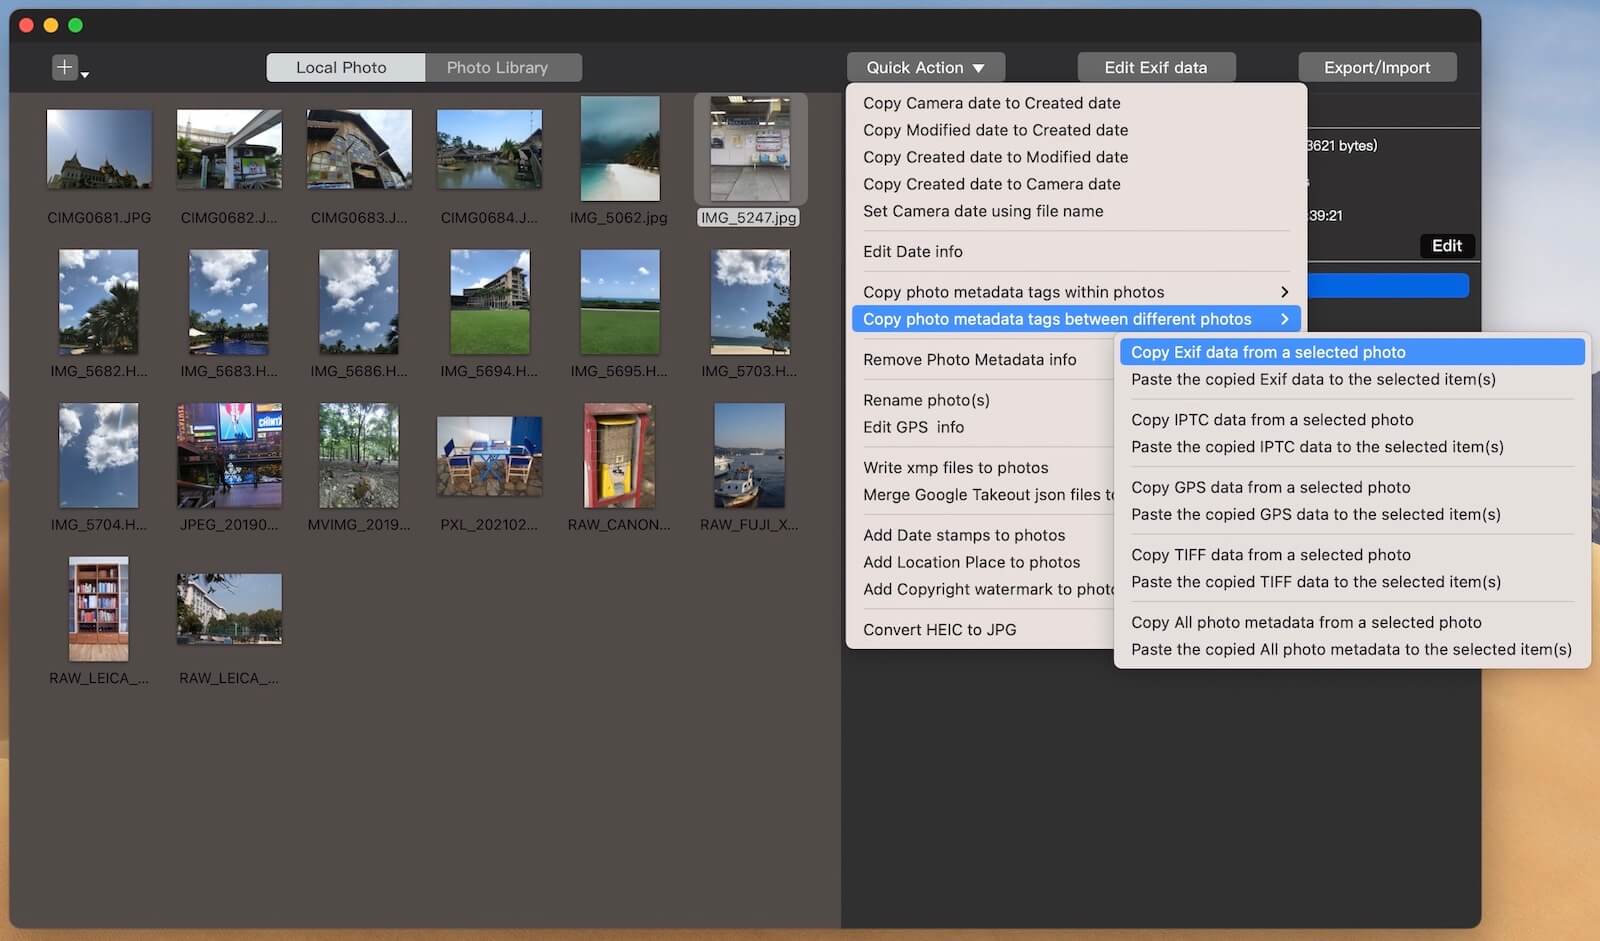
In addition to adding photo metadata manually, you can also copy and paste metadata from other photos that already contain the same details using the Photo Exifer app.
Your scanned photos now include proper metadata, making them fully searchable, organized, and shareable.

About Fireebok Studio
Our article content is to provide solutions to solve the technical issue when we are using iPhone, macOS, WhatsApp and more. If you are interested in the content, you can subscribe to us. And We also develop some high quality applications to provide fully integrated solutions to handle more complex problems. They are free trials and you can access download center to download them at any time.
| Popular Articles & Tips You May Like | ||||
 |
 |
 |
||
| Five ways to recover lost iPhone data | How to reduce WhatsApp storage on iPhone | How to Clean up Your iOS and Boost Your Device's Performance | ||