Have you ever encountered sudden loss of some documents (Microsoft word, pages, excel files) on your Mac? We cannot find them in the original Finder location. This can happen when macOS is upgraded, iCloud Drive is turned off, or other unknown situations. But there are often some documents that are important to us, and we don't want to lose them. If you are looking for some useful ways to retrieve them, the following article content will help you.
Retrieve from iCloud
In order to work better on all your devices, Apple stores your Desktop and Documents folder in iCloud Drive so that you can access them on all iPhone, iPad, and Mac devices. If you turn off When Desktop & Documents Folders, all folder and files from Desktop & Documents stored iCloud Drives will disappear from your Mac.
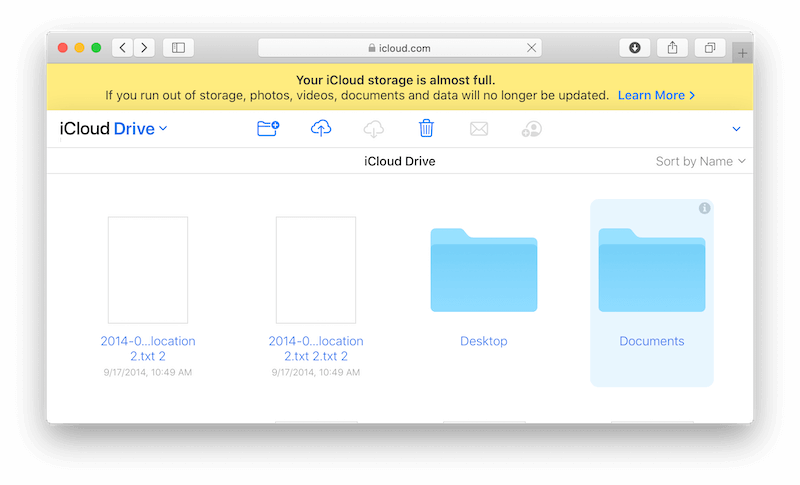
Turn on Desktop and Documents on your Mac, it will download and sync them again. From your Mac, choose Apple menu > System Preferences. Click Apple ID, then click iCloud. In macOS Mojave or earlier, choose Apple menu > System Preferences, then click iCloud. Make sure that iCloud Drive is turned on. Next to iCloud Drive, click Options -> select Desktop & Documents Folders.
Retrieve from Trash
All files and folders are moved to the trash can, and they will be kept in the trash for 30 days before being deleted. If we can retrieve them in the trash, we just need to put them back in original place.
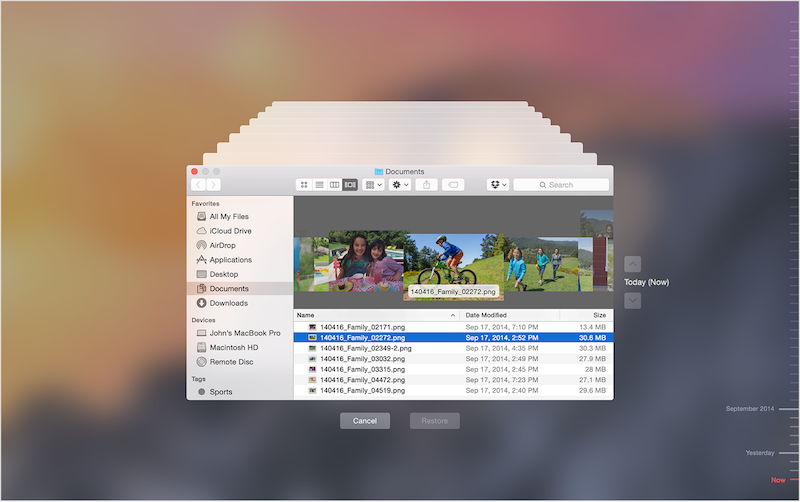
Restore items from the Time Machine backup
If you made a Time Machine backup using an external disk before the deletion, you can easily get back lost items or recover older versions of files from the Time Machine backup. Connect the Time Machine backup external disk, then click the Time Machine icon in the menu bar and Enter Time Machine. Select a right backup with the timeline, then click Restore to restore from the backup.
Recover with Fireebok Data Recovery
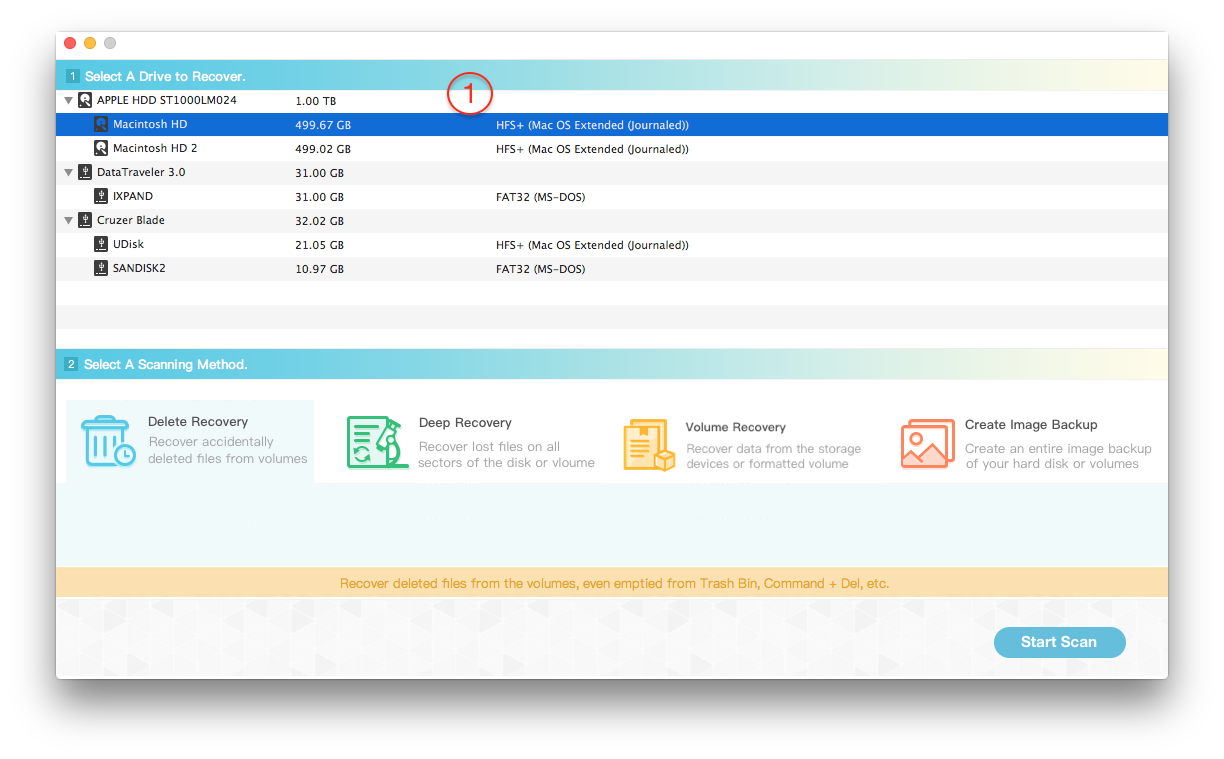
If you don't have any backups, you can still use Fireebok Data Recovery to recover lost documents from your computer disk. Download and install Fireebok Data Recovery on your Mac.
Run Fireebok Data Recovery, and then choose the computer disk drive, and then select Delete Recovery or Deep Recovery mode, clic Start Scan button to scan.
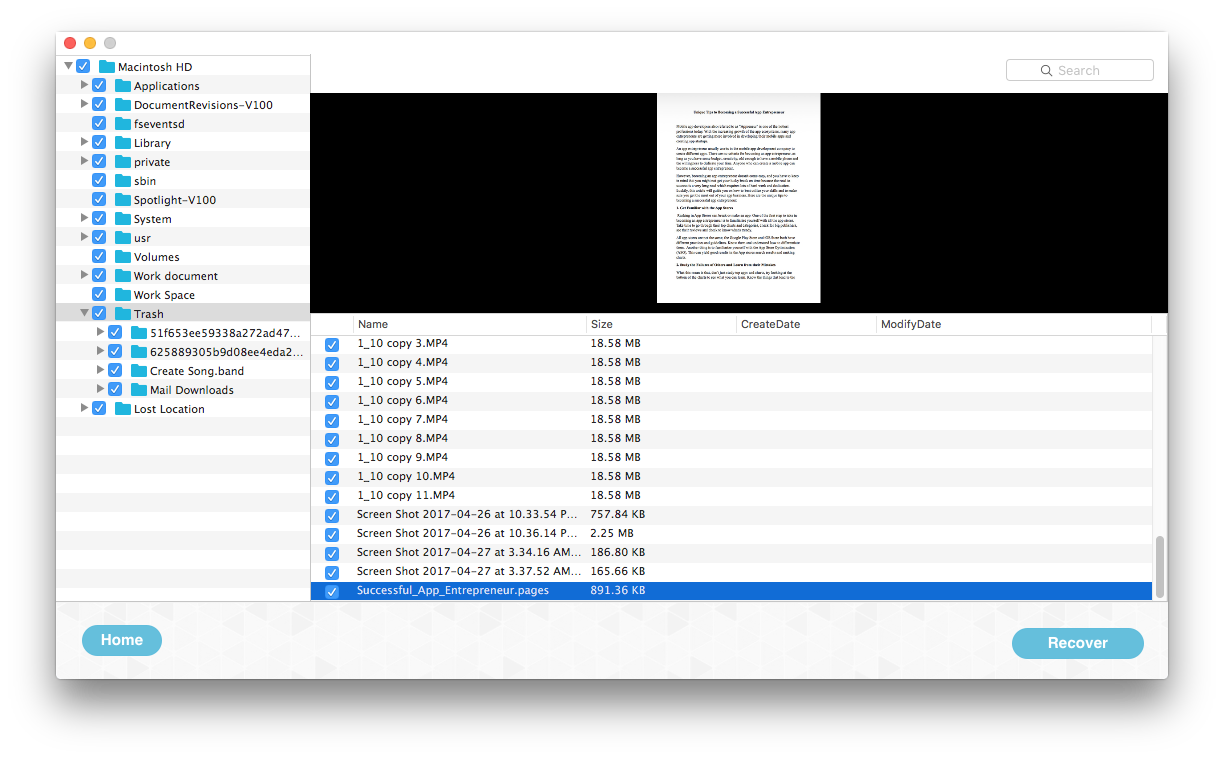
After the scan is completed, preview and save the recovered files, and click the “Recover” button to save.
| More Related Articles | ||||
 |
1. How to find and remove duplicate photos from Photos? 2. How to batch rename photos within the Photos app on Mac? |
|||
About Fireebok Studio
Our article content is to provide solutions to solve the technical issue when we are using iPhone, macOS, WhatsApp and more. If you are interested in the content, you can subscribe to us. And We also develop some high quality applications to provide fully integrated solutions to handle more complex problems. They are free trials and you can access download center to download them at any time.
| Popular Articles & Tips You May Like | ||||
 |
 |
 |
||
| Five ways to recover lost iPhone data | How to reduce WhatsApp storage on iPhone | How to Clean up Your iOS and Boost Your Device's Performance | ||