After upgrading to macOS Tahoe, many Mac users have reported that their older documents are no longer appearing in their original folders. Some files cannot be found through Spotlight search, and in many cases, it looks like important documents have disappeared entirely after the update.
If you're facing the same issue, this guide explains why your documents may be missing and provides effective solutions to help you find and recover lost documents on macOS Tahoe.
Why Documents Go Missing After macOS Tahoe Update
There are typically two reasons why documents seem to disappear after installing macOS Tahoe:
1. The document still exists on your Mac but can’t be found
This often happens when Spotlight’s index becomes corrupted or incomplete during the macOS upgrade, causing files to disappear from search results.
2. The document was actually deleted or lost during the macOS update
In some rare cases, files may not transfer correctly during a system update, making them appear missing or deleted.
Regardless of the cause, the methods below will help you locate or recover your missing files.
1. Scan Your Mac Disk and Recover Lost Documents
Whether your files exist but cannot be found, or were actually deleted, you can use a professional recovery tool like Fireebok Data Recovery to scan your Mac’s disk. It can detect both existing files and deleted/lost documents on macOS Tahoe. Steps:
1. Download and install Fireebok Data Recovery on your Mac. Add the app to the Full Disk Access list: System Settings → Privacy & Security → Full Disk Access. This allows the app to read and scan your disk properly.
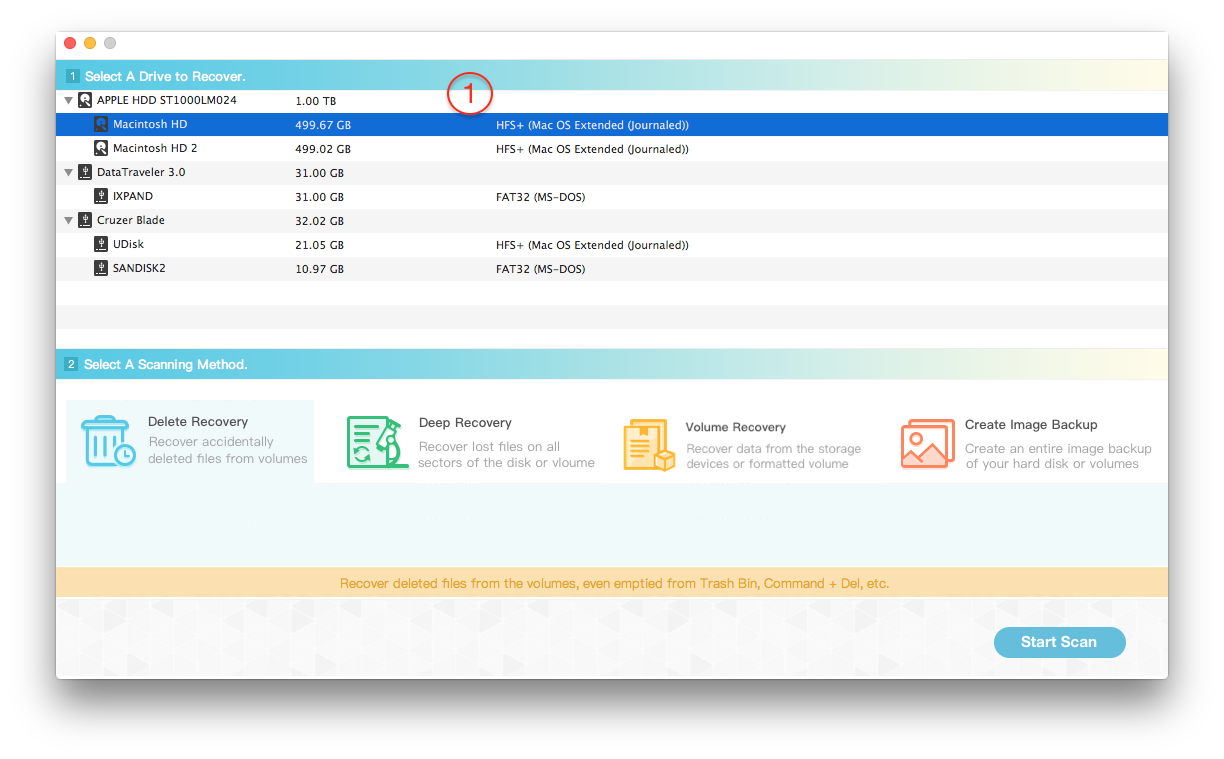
2. Launch Fireebok Data Recovery. Select your Mac’s disk or volume. Choose Deleted Recovery or Deep Recovery mode. Click Start Scan to begin scanning your drive.
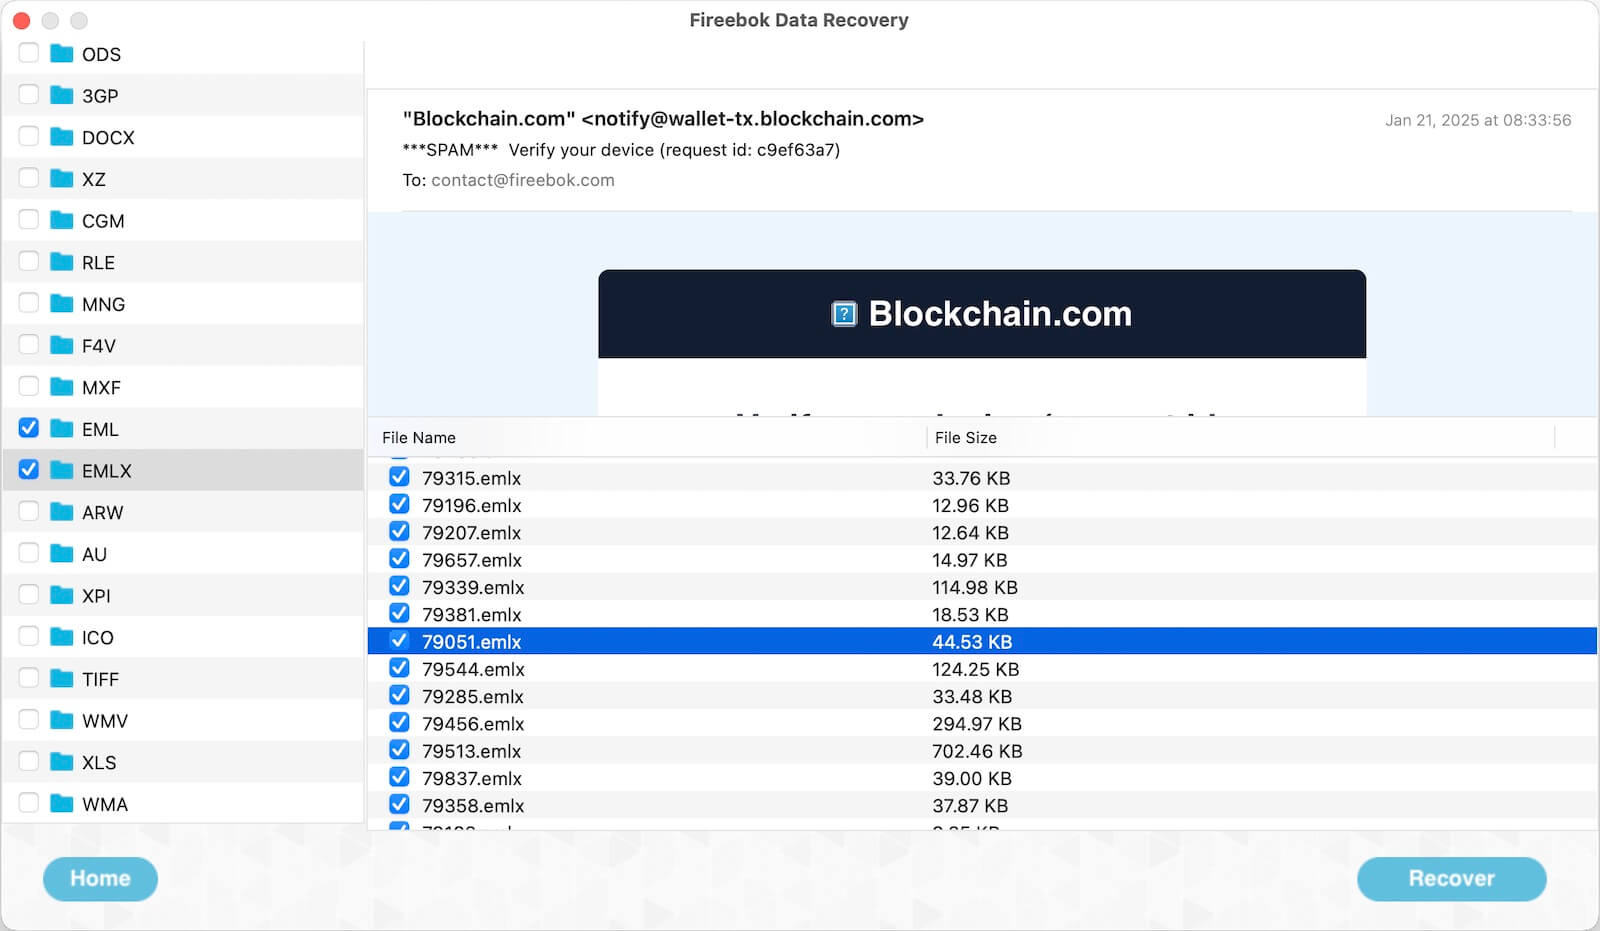
3. After the scan completes, preview any found documents. Select the files you want to restore and click Recover.
This method is the most effective when documents are truly deleted or missing after the macOS Tahoe update.
2. Rebuild the Spotlight Index
If your documents are still on the disk but cannot be found through Spotlight search, reindexing Spotlight can often resolve the problem. How to Rebuild Spotlight Index on macOS Tahoe:
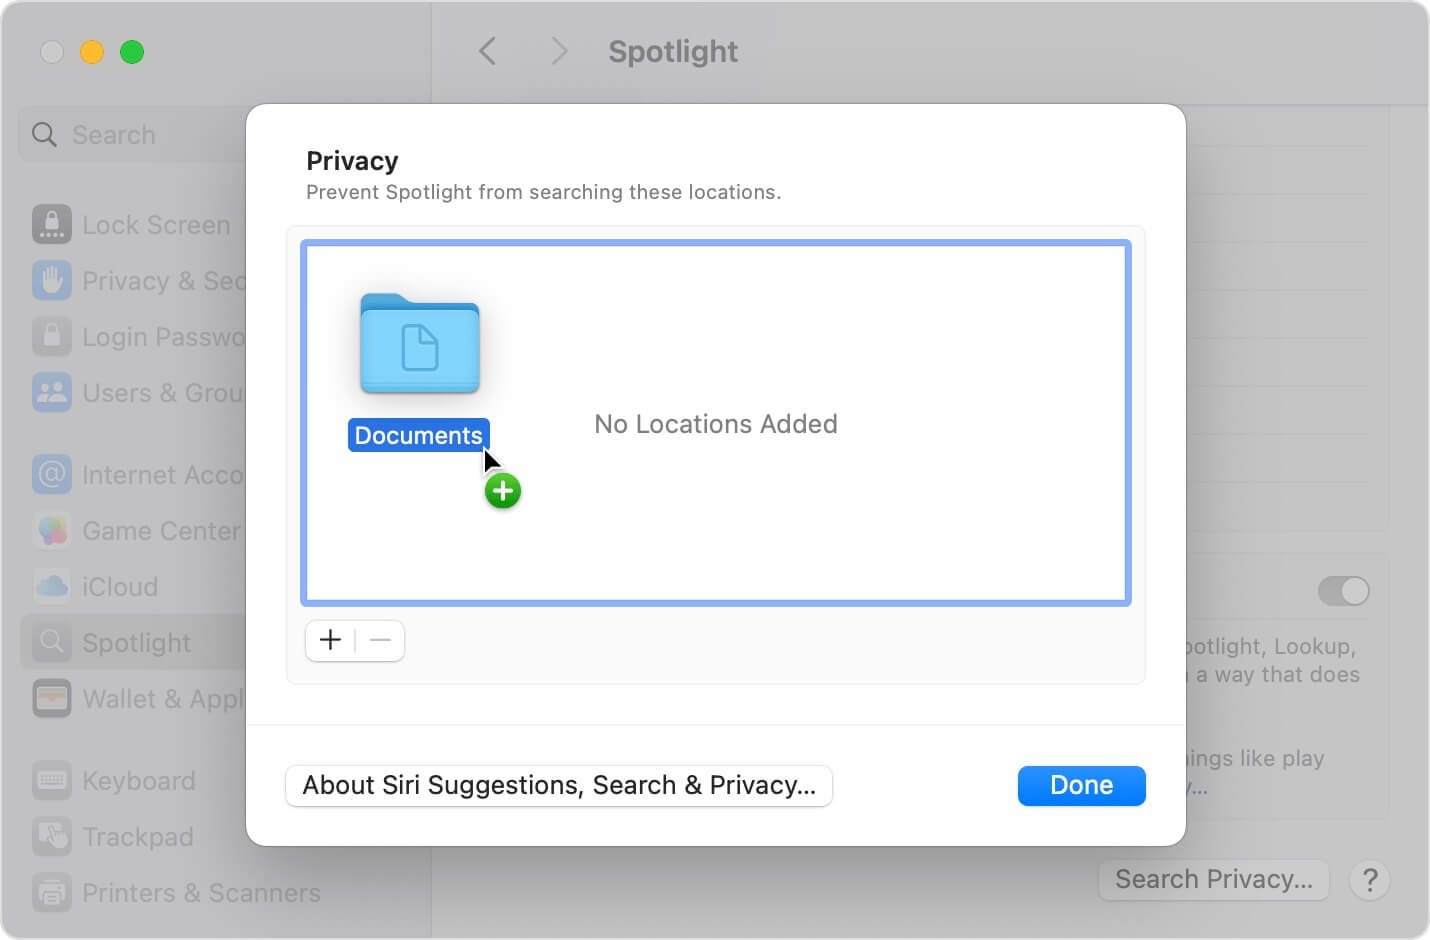
1. Open System Settings. Go to Siri & Spotlight. Scroll down and select Spotlight Privacy.
2. Add your main disk to the list to exclude it. Then remove it, which forces Spotlight to rebuild its index. Close System Settings and wait for the reindexing process to finish.
3. Restart your Mac. After the Spotlight index is rebuilt, try searching for your missing documents again.
3. Recover Missing Documents From iCloud Drive
If your documents were in a folder that syncs with iCloud Drive, they may have been deleted on another iPhone, iPad, or Mac—causing them to disappear from your current Mac as well. You may be able to restore the deleted files directly from iCloud. Steps to Restore Deleted Files From iCloud Drive:
1. Visit www.icloud.com and sign in with your Apple ID and Password.
2. Go to Settings. Scroll down and select Restore Files under the Advanced section.
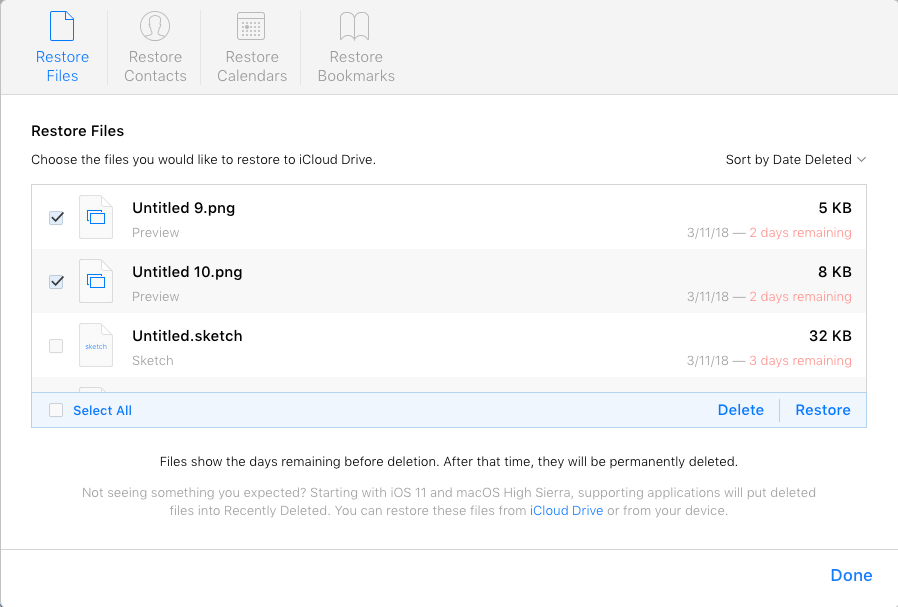
3. Choose the documents you want to restore. Click Restore to recover them back to iCloud Drive. Once restored, the files should reappear on your Mac when iCloud syncs again.
Final Thoughts
Missing documents after a macOS Tahoe upgrade can be stressful, but most files can be recovered using the methods above. Start by rebuilding Spotlight if you believe the files still exist. If the documents were deleted or lost, use a professional data recovery tool. And if you rely on iCloud Drive, don’t forget to check the iCloud restore options as well.

About Fireebok Studio
Our article content is to provide solutions to solve the technical issue when we are using iPhone, macOS, WhatsApp and more. If you are interested in the content, you can subscribe to us. And We also develop some high quality applications to provide fully integrated solutions to handle more complex problems. They are free trials and you can access download center to download them at any time.
| Popular Articles & Tips You May Like | ||||
 |
 |
 |
||
| Five ways to recover lost iPhone data | How to reduce WhatsApp storage on iPhone | How to Clean up Your iOS and Boost Your Device's Performance | ||