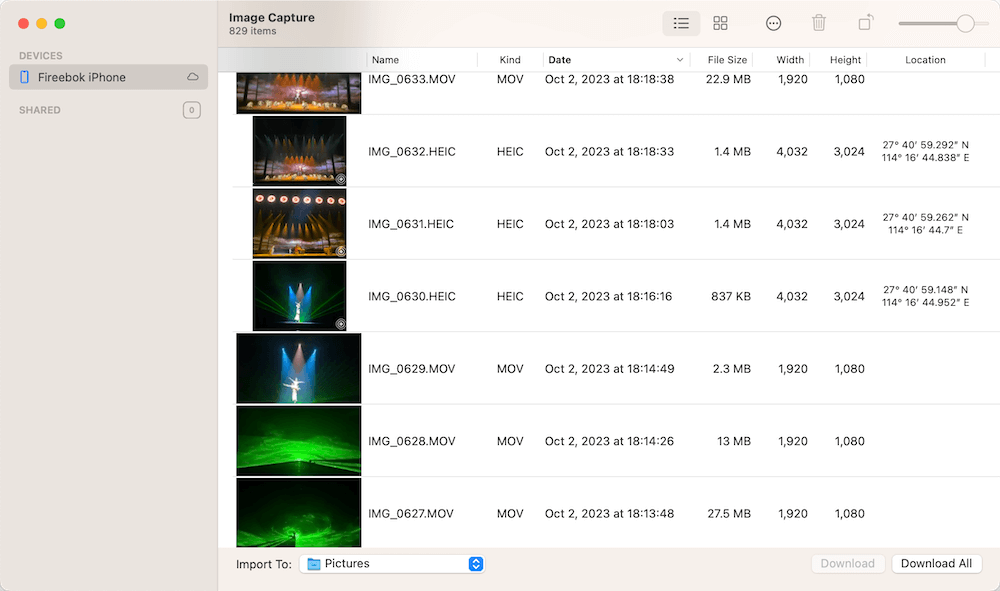
Many Mac users rely on the built-in Image Capture app to download and transfer photos from an iPhone, iPad, or digital camera to their Mac or an external hard drive. Often, users enable the “Delete after Import” option to free up space on their devices after the transfer.
However, sometimes things go wrong — for example, the USB cable disconnects, the external hard drive runs out of space, your Mac storage is full, or your MacBook battery dies during the transfer. In these cases, the transfer process may fail, and all your photos and videos could be deleted from your iPhone or camera without being saved on the Mac or external drive.
If you’ve experienced this issue and lost your photos after using Image Capture on your Mac, this guide will show you how to recover lost photos and videos step-by-step.
1. For Digital Camera Devices
If you transferred photos or videos from a digital camera to your Mac or external hard drive and they were lost during the process, you can recover them from the camera’s SD card using Fireebok Data Recovery.
Steps:
1. Download and install Fireebok Data Recovery on your Mac.
2. Connect your camera or SD card to your Mac using a USB cable or card reader.
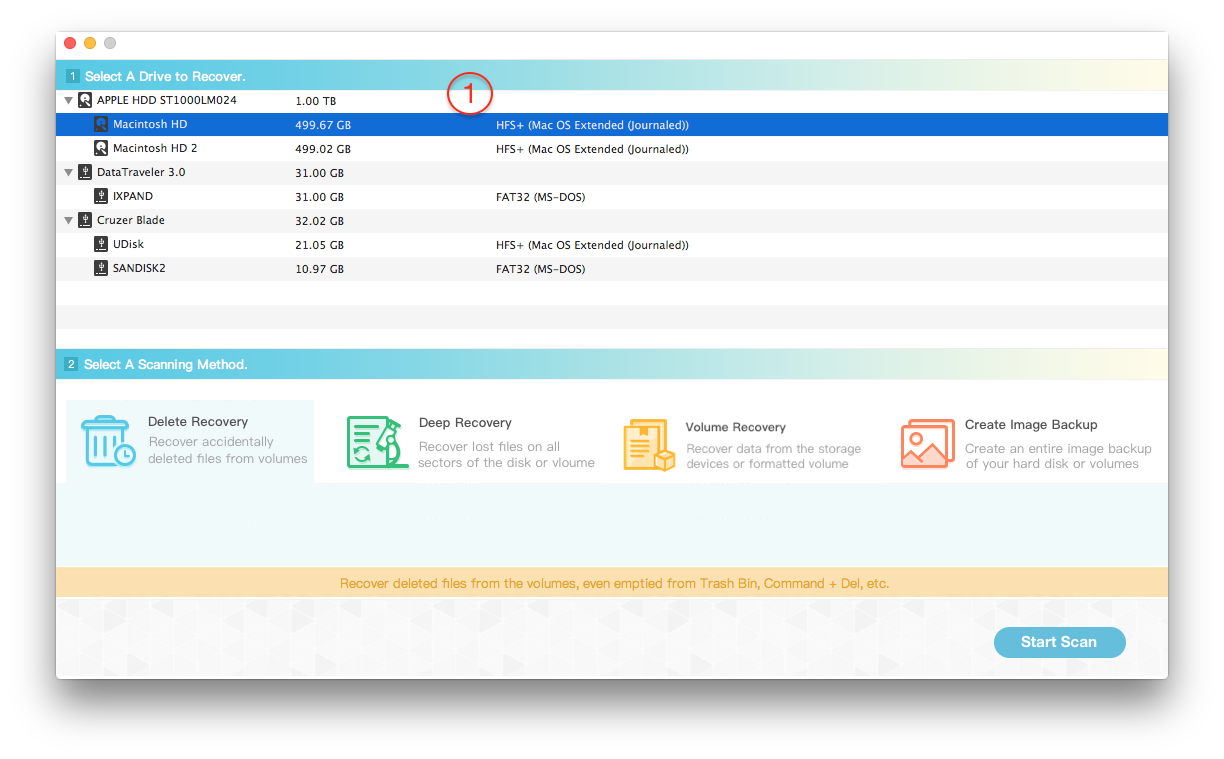
3. Open Fireebok Data Recovery → select your SD card → choose Deleted Recovery mode → click Start Scan.

4. If the photos aren’t found, go back and select Deep Recovery mode. (This scan takes longer but finds more files.)
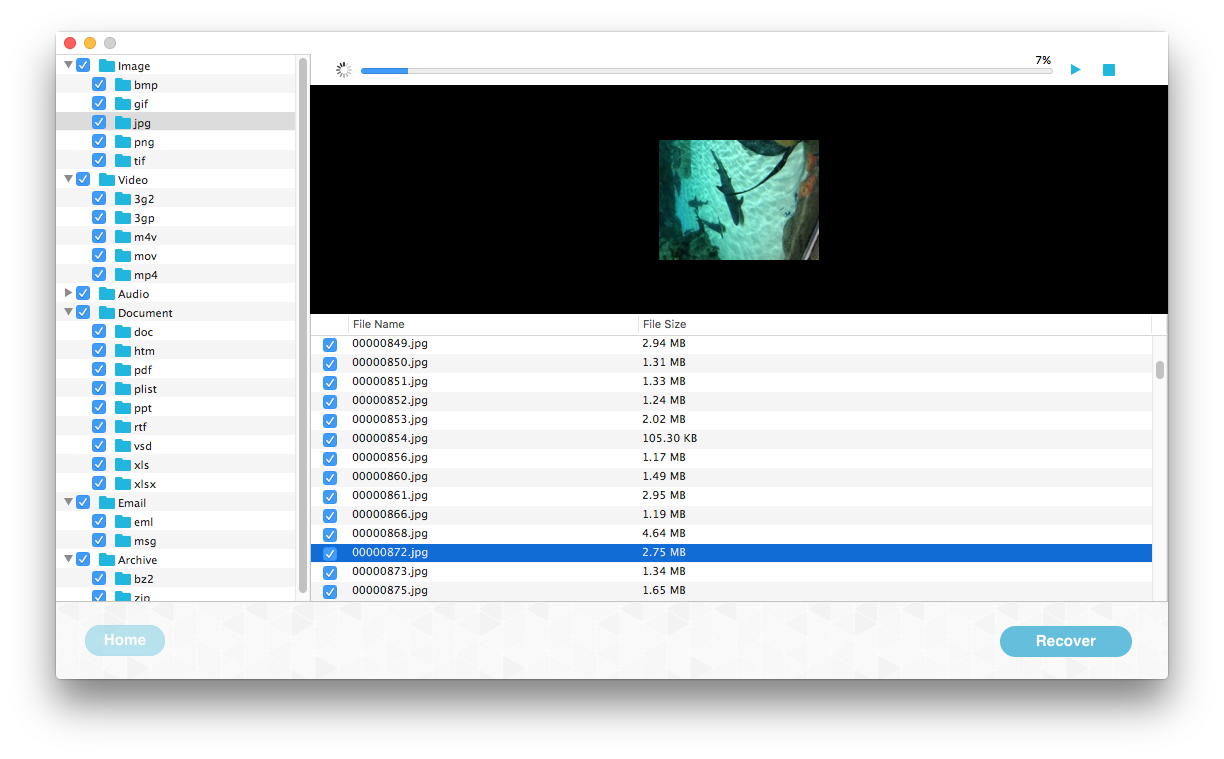
5. Once the scan is complete, preview the photos and videos, then select and recover the ones you want to save.

2. For iPhone or iPad Devices
If you transferred photos and videos from an iPhone or iPad to your Mac or external hard drive using Image Capture:
1. First, check the Recently Deleted album on your iPhone or iPad. Your lost photos might still be there and can be easily restored.

2. If they’re not there, use Fireebok Data Recovery to recover the lost photos from your Mac startup disk or external hard drive (depending on where the transfer was saved).
Steps:
1. Open Fireebok Data Recovery and select the Mac disk or external drive that was the target location.
2. Choose Deleted Recovery or Deep Recovery mode, then click Start Scan.
3. After scanning, preview the found photos and videos, then recover and save them to a safe location.
Tips to Prevent Future Data Loss
1. Avoid using “Delete after Import” in Image Capture — always confirm your transfer was successful before deleting files from your device.
2. Check the transferred photos and videos on your Mac or external drive before removing them from your camera, iPhone, or iPad.
3. Keep your Mac charged and ensure sufficient storage space before starting large file transfers.
| More Related Articles | ||||
 |
1. How to find and remove duplicate photos from Photos? 2. How to batch rename photos within the Photos app on Mac? |
|||
About Fireebok Studio
Our article content is to provide solutions to solve the technical issue when we are using iPhone, macOS, WhatsApp and more. If you are interested in the content, you can subscribe to us. And We also develop some high quality applications to provide fully integrated solutions to handle more complex problems. They are free trials and you can access download center to download them at any time.
| Popular Articles & Tips You May Like | ||||
 |
 |
 |
||
| Five ways to recover lost iPhone data | How to reduce WhatsApp storage on iPhone | How to Clean up Your iOS and Boost Your Device's Performance | ||