It's common to divide a hard drive into two or more partitions with different file system formats to organize files. However, some Mac users have reported an issue where a previously accessible hard drive with multiple partitions suddenly shows only one partition in Finder. Even using Disk Utility doesn’t resolve the issue, and the missing partition may still contain important data.
In this article, we’ll guide you through the steps to recover and mount a missing partition on your Mac.
1. Why Does a Partition Go Missing?
Here are some common reasons why only one partition might be visible:
• The partition is unmounted: It exists but is not currently mounted in macOS.
• The partition is hidden: It has been hidden by a disk management or third-party tool.
• The partition is corrupted: File system errors or corruption make it inaccessible.
If the partition is simply hidden or unmounted, you can use the diskutil command in Terminal to mount it.
How to Mount a Missing Partition Using diskutil:
1. Open the Terminal app (found in /Applications/Utilities), Type the following command: diskutil list and press Return:
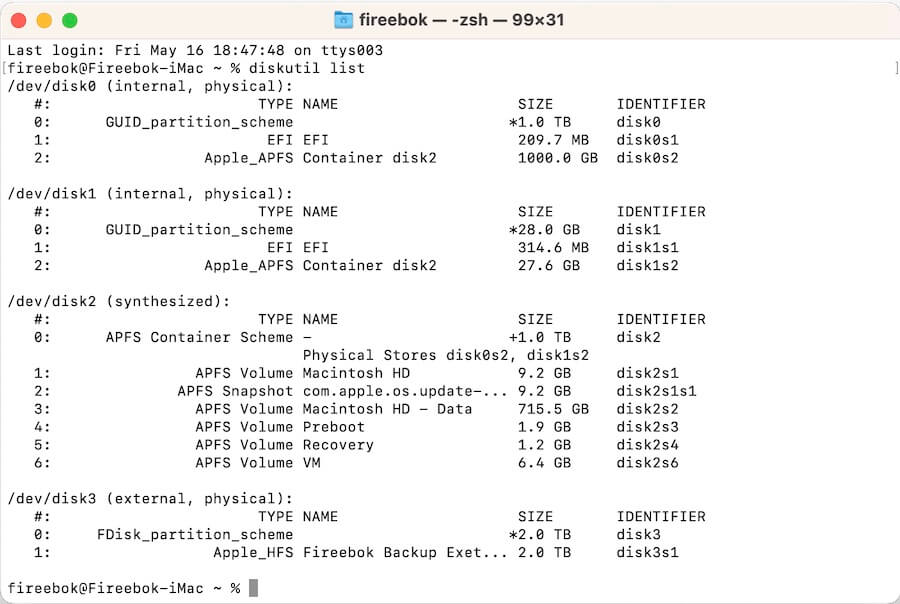
2. Look for the identifier of the missing partition (e.g., /dev/disk3s2).
3. Mount all mountable volumes on a specific disk: diskutil mountDisk /dev/disk3, or mount a specific partition: diskutil mount /dev/disk3s2
If the partition mounts successfully, it should appear in Finder.
2. How to Recover Data from a Missing Partition
If the partition is corrupted or cannot be mounted, data recovery is still possible. We recommend using Fireebok Data Recovery, which includes a Lost Partition Recovery mode to help retrieve files from missing partitions. Here are steps to Recover Data Using Fireebok Data Recovery:
1. Download and install Fireebok Data Recovery on your Mac.
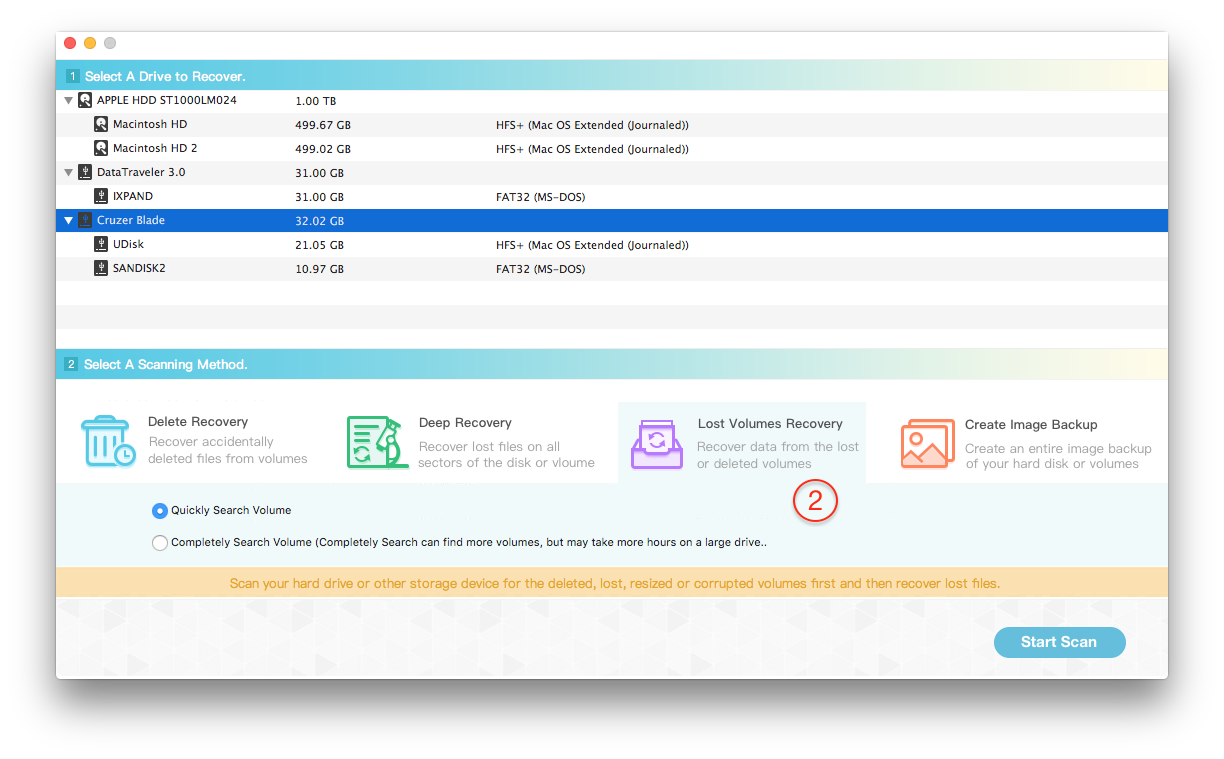
2. Launch the app and select the external hard drive that contains the missing partition. Choose Lost Volume Recovery, then select Quick Search Volume and click the Start Scan button.
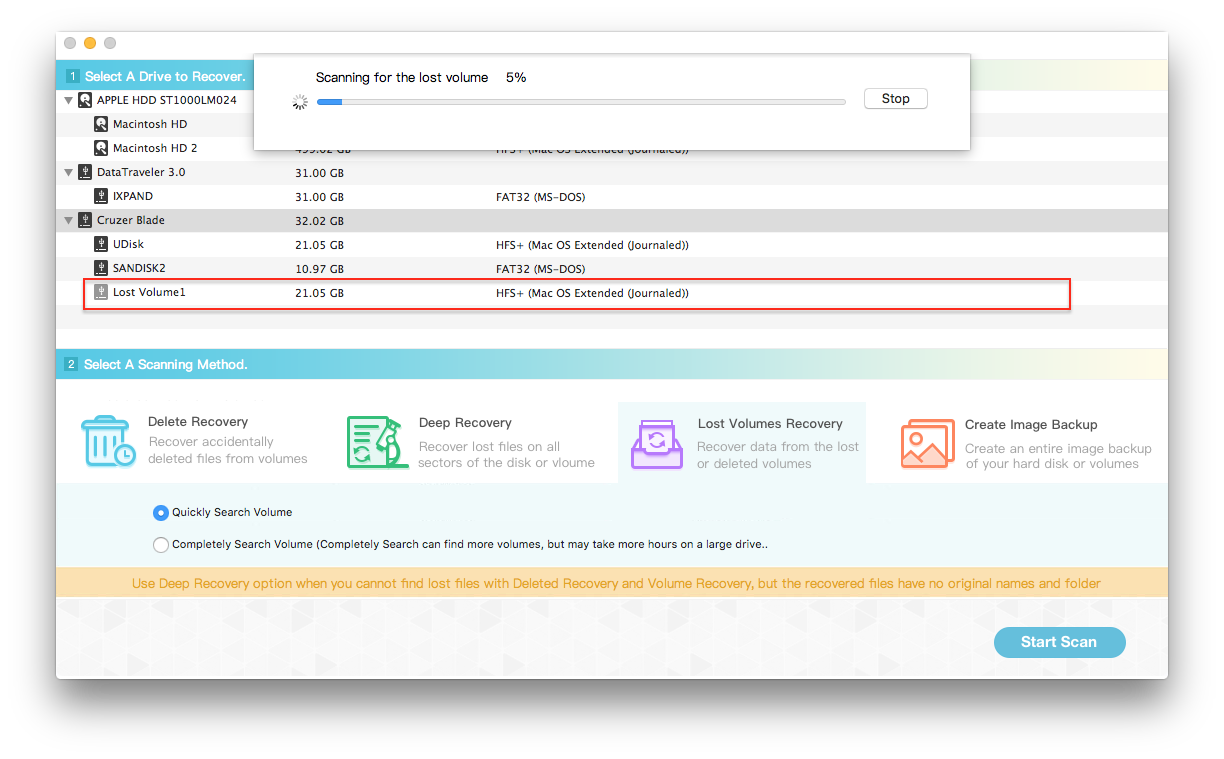
3. Once the scan is complete, the tool will list all found partitions—including the missing one—along with their file size and format.
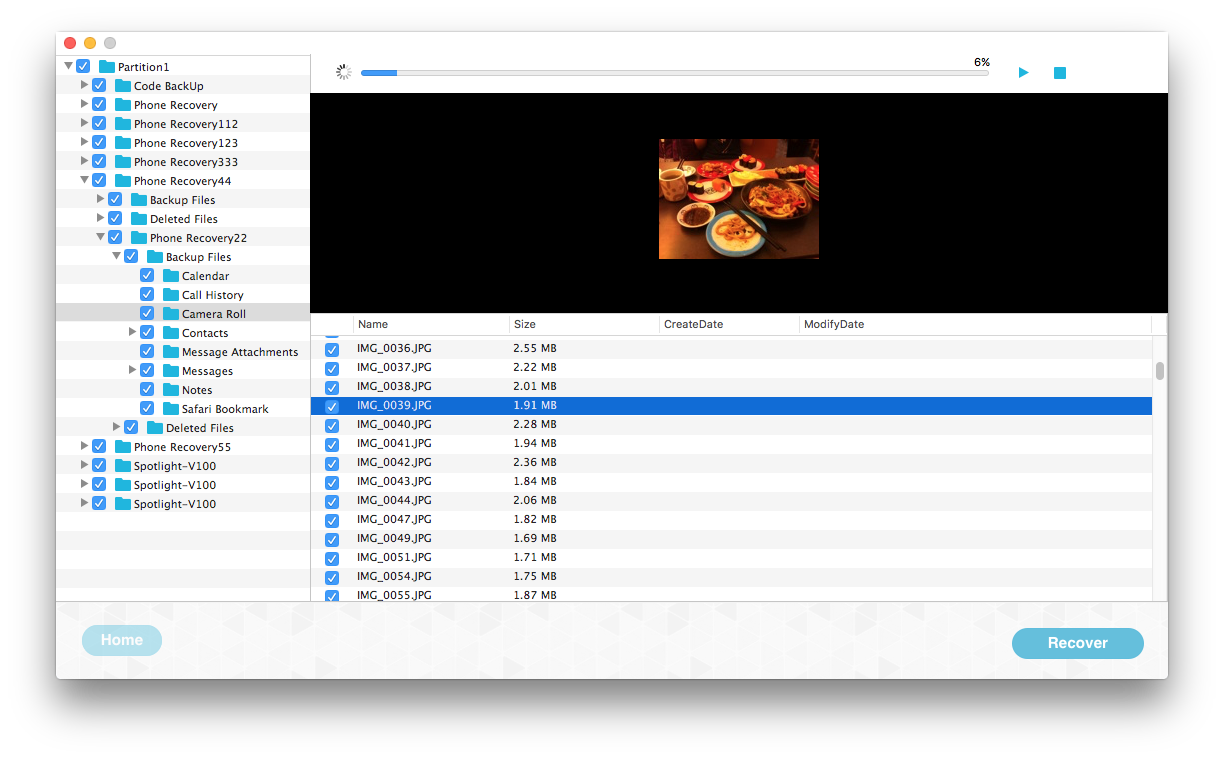
4. Select your missing partition, choose Deep Recovery, and click Start Scan to scan the files on that volume.

5. After the scan finishes, preview the files and select the ones you want to recover. Save the recovered files to a different drive or USB device (not the same drive to avoid overwriting data).
| More Related Articles | ||||
 |
1. How to sync all your bookmarks on different browsers on Mac? 2. How to fix your macOS system storage is so huge |
|||
About Fireebok Studio
Our article content is to provide solutions to solve the technical issue when we are using iPhone, macOS, WhatsApp and more. If you are interested in the content, you can subscribe to us. And We also develop some high quality applications to provide fully integrated solutions to handle more complex problems. They are free trials and you can access download center to download them at any time.
| Popular Articles & Tips You May Like | ||||
 |
 |
 |
||
| Five ways to recover lost iPhone data | How to reduce WhatsApp storage on iPhone | How to Clean up Your iOS and Boost Your Device's Performance | ||