Managing a growing photo library on your iPhone can quickly become overwhelming. Albums in the Photos app are designed to help you organize and group related photos and videos, making it easier to find what you need. But over time, some synced or transferred photos may never get assigned to an album, leaving them scattered and unorganized in your main photo library.
If you’re wondering how to find all photos not in any album on your iPhone and organize them into albums, this guide will show you the best ways to do it — both on iPhone and Mac.
Why Albums Are Important in the Photos App
Albums are more than just folders — they’re a way to structure and manage your photo collection. Instead of scrolling through thousands of images in “All Photos,” albums let you group related content, such as vacation pictures, family events, or work-related photos. Without albums, finding specific photos becomes time-consuming and frustrating.
Can You Find Photos Not in Any Album on iPhone?
Unfortunately, the built-in Photos app on iPhone does not provide a smart filter to show photos that aren’t in any album. Apple’s Photos app for Mac includes this capability through Smart Albums, but the iOS version does not.
To solve this on iPhone or iPad, you’ll need to use a third-party app. One popular option is Photos Exifer, available on the App Store. This app can scan your entire photo library, identify photos not assigned to any album, and let you batch-move them into albums with just a few taps.
How to Find and Organize Photos Not in Any Album Using Photos Exifer
Follow these steps:
1. Download and Install Photos Exifer. Get Photos Exifer from the App Store on your iPhone or iPad.
2. Scan Your Photo Library. Open Photos Exifer and tap the Original tab at the bottom. The app will scan for duplicate photos, large files, photos without captions, and — most importantly — photos not in any album.
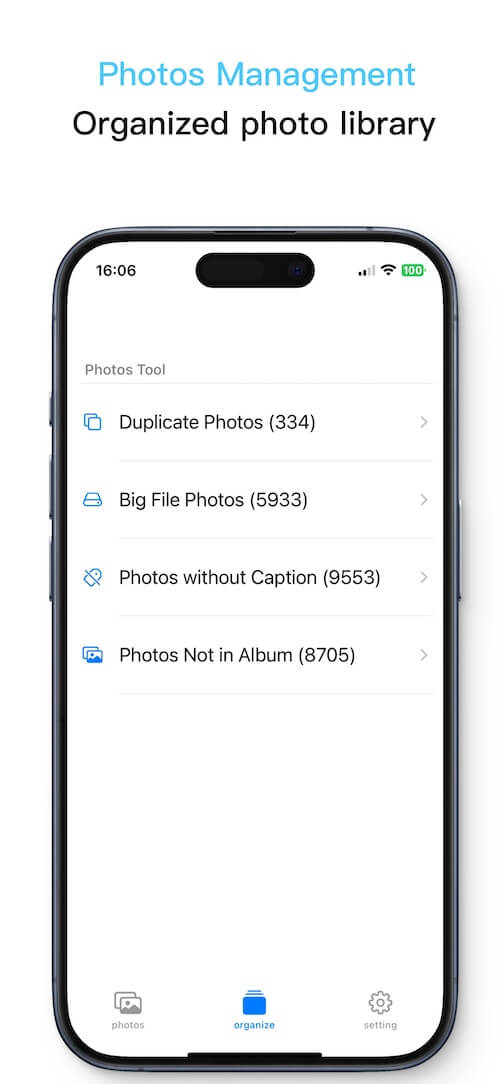
3. View Photos Not in Any Album. Tap Photos Not in Album to see all images that haven’t been added to any album.
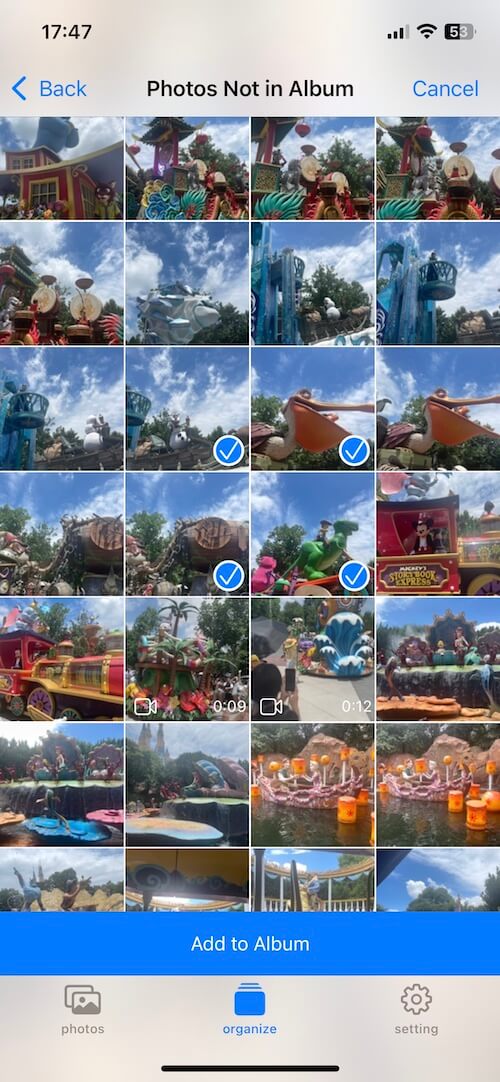
4. Select and Move Photos to Albums. Tap Select in the top-right corner, choose the photos you want to organize, then tap Add to Album. You can move them into an existing album or create a new one.
This process allows you to clean up your photo library and make sure every photo is properly organized.
How to Do It on Mac Using Smart Albums
If you use a Mac with iCloud Photos enabled, you can filter and organize photos not in any album directly in Apple Photos on macOS:
1. Open the Photos App on Your Mac. Go to File -> New Smart Album… Name the album (e.g., “No Album”). Set the filter to Album is not Any. Click OK — the Smart Album will now display all photos not in any album.
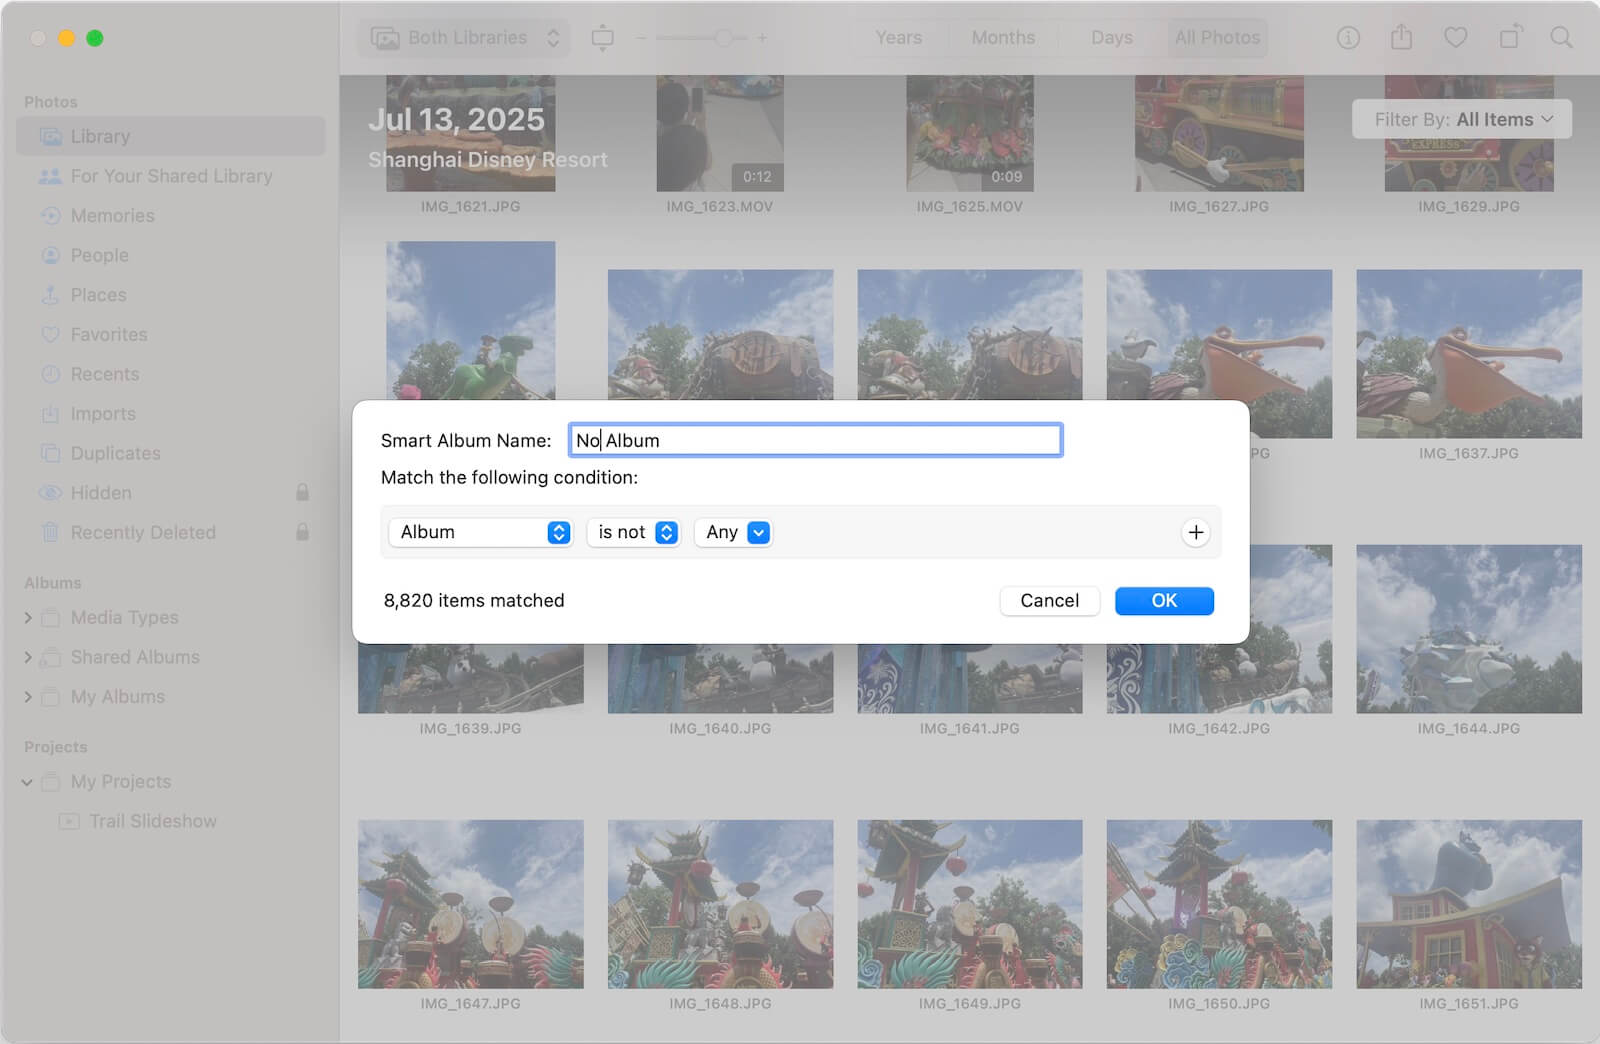
2. Select these photos and move them into albums as needed. Once organized on your Mac, iCloud Photos will sync the updated album structure back to your iPhone.
Final Thoughts
Keeping your photo library organized saves time and makes your iPhone Photos experience much smoother. While the iPhone Photos app doesn’t natively show photos not in any album, tools like Photos Exifer (for iOS) or Smart Albums (on Mac) can help you find and organize them efficiently.
By regularly checking for unassigned photos and adding them to albums, you’ll always know where to find your favorite memories — without endless scrolling.

About Fireebok Studio
Our article content is to provide solutions to solve the technical issue when we are using iPhone, macOS, WhatsApp and more. If you are interested in the content, you can subscribe to us. And We also develop some high quality applications to provide fully integrated solutions to handle more complex problems. They are free trials and you can access download center to download them at any time.
| Popular Articles & Tips You May Like | ||||
 |
 |
 |
||
| How to Recover Deleted Text Messages from Your iPhone | Top 6 reasons WhatsApp can’t backup | How to Clean up Your iOS and Boost Your Device's Performance | ||